Cuối tuần rảnh rỗi ngồi tìm hiểu thêm về VueJs. (Latest stable version: 2.6.11) Framework Frontend nổi tiếng bên cạnh ReactJs và AngularJs.
Theo như định nghĩa trên trang chủ thì Vue là một framework dùng để xây dựng giao diện người dùng (user interfaces). Cụ thể, Vue là một progressive framework (framework linh động), cho phép và khuyến khích phát triển ứng dụng theo từng bước. Phần lõi của VueJS chủ yếu là vào phần View, ngoài ra có thể cài thêm các thành phần, thư viện hỗ trợ để đáp ứng nhu cầu xây dựng những ứng dụng SPA (Single-Page-Applications) . Khác với các monolithic framework (framework nguyên khối) cung cấp tất cả mọi thứ cần có để xây dựng app trong một framework duy nhất.
Để bắt đầu không gì nhanh nhất bằng cách vào thẳng trang chủ của nó tại https://vuejs.org, đọc và thực hành theo.
Cài đặt npm install -g @vue/cli Khởi tạo dự án vue create hello-world Khởi động server Vue vue-cli-service serve Build & mang đi khoe vue-cli-service build
Sau một thời gian code ra được môt trang web xịn xò thì bạn có nhu cầu đưa lên internet để mọi người được biết. Bắt đầu với công việc đầu tiên là tìm mua tên miền, hosting hoặc VPS. Bạn có thể mua VPS lại Vultr. 1 VPS có thể cài đặt được nhiều trang web.
Như vậy sau quá trình chuẩn bị thành công, chúng ta sẽ đẩy code từ local lên hosting, server. Quá trình này khá là mất công. Cách cổ điển hiện nay được nhiều người dùng là dùng FTP, hoặc upload thằng từ các trang quản lý. Đây là công việc khá nhàm chán, tốn thời gian. Khi có một thay đổi nhỏ là phải đi thao tác lại.
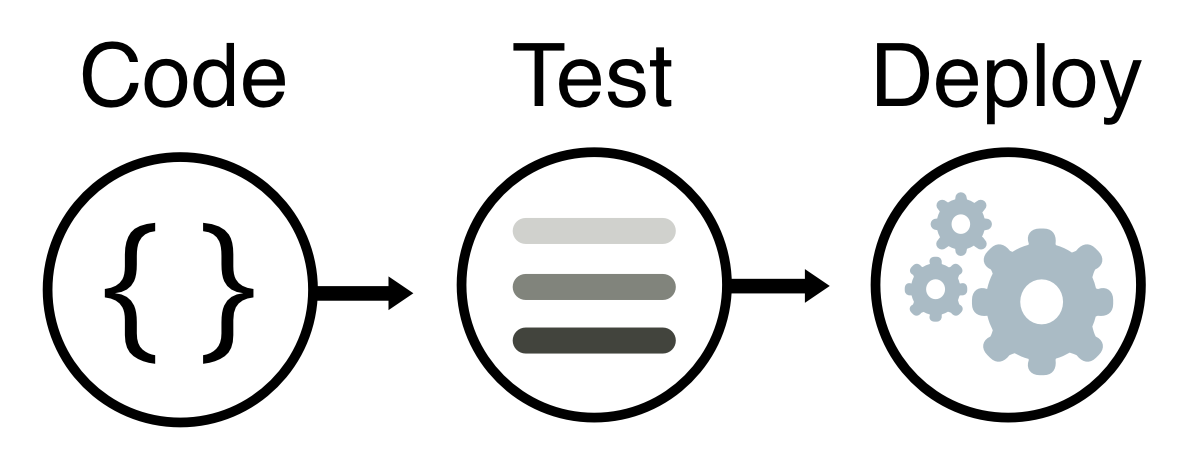
Chính vì vậy khái niệm CI/CD ra đời. CI/CD là một bộ đôi công việc, bao gồm CI (Continuous Integration) và CD (Continuous Delivery), ý nói là quá trình tích hợp (integration) thường xuyên, nhanh chóng hơn khi code cũng như thường xuyên cập nhật phiên bản mới (delivery).
Có khá nhiều công cụ hỗ trợ CI/CD, nhưng trong phạm vi bài viết chỉ đề cập công cụ CI/CD của Gitlab, và tất nhiên sử dụng tính năng free. Nếu bạn dùng nhiều hơn, phải trả thêm phí. Khi đó công việc sau khi code xong chỉ là nhấn nút push lên gitlab, ngồi uống cafe và đợi thành qủa.
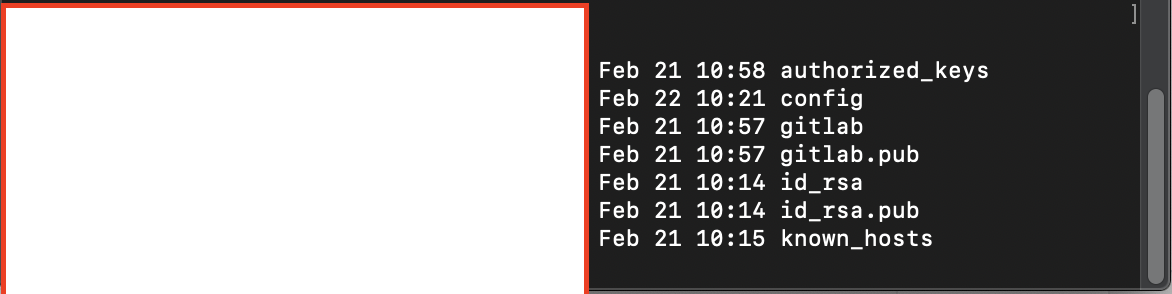
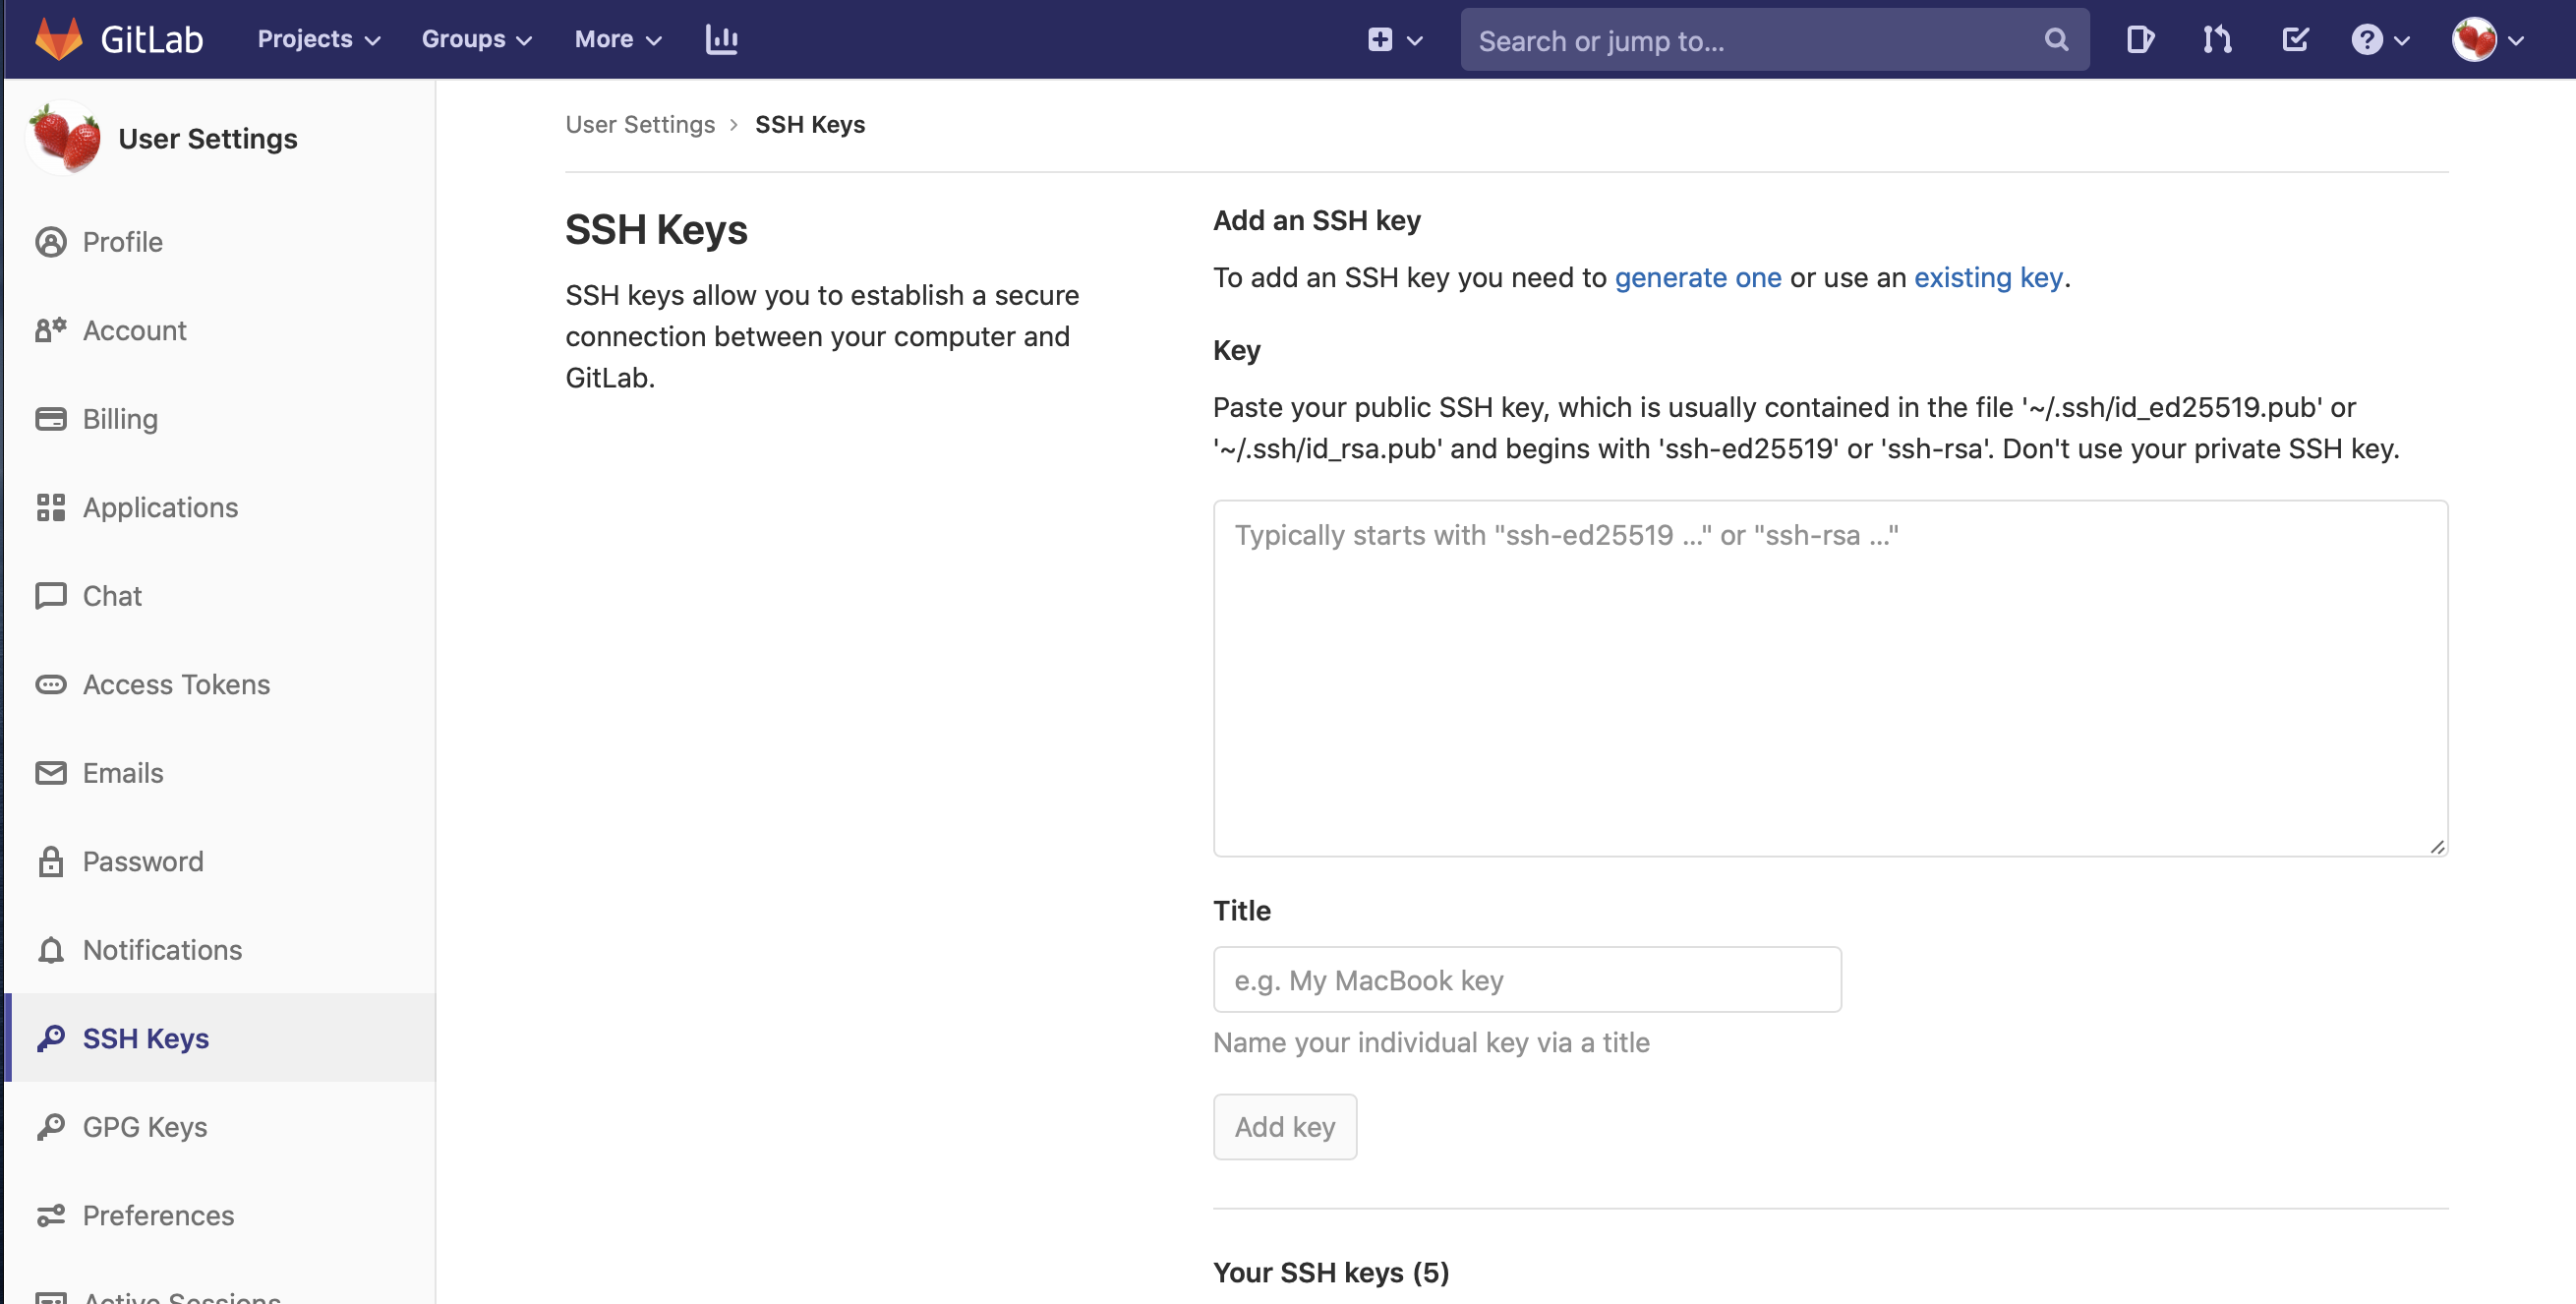
Để tiết kiệm thời gian cài đặt và mọi thứ suôn sẻ, bạn cần có một chút kiến thức về VPS, SSH, public key, private key…
Một số thứ cần chuẩn bị trước khi bắt tay vào làm.
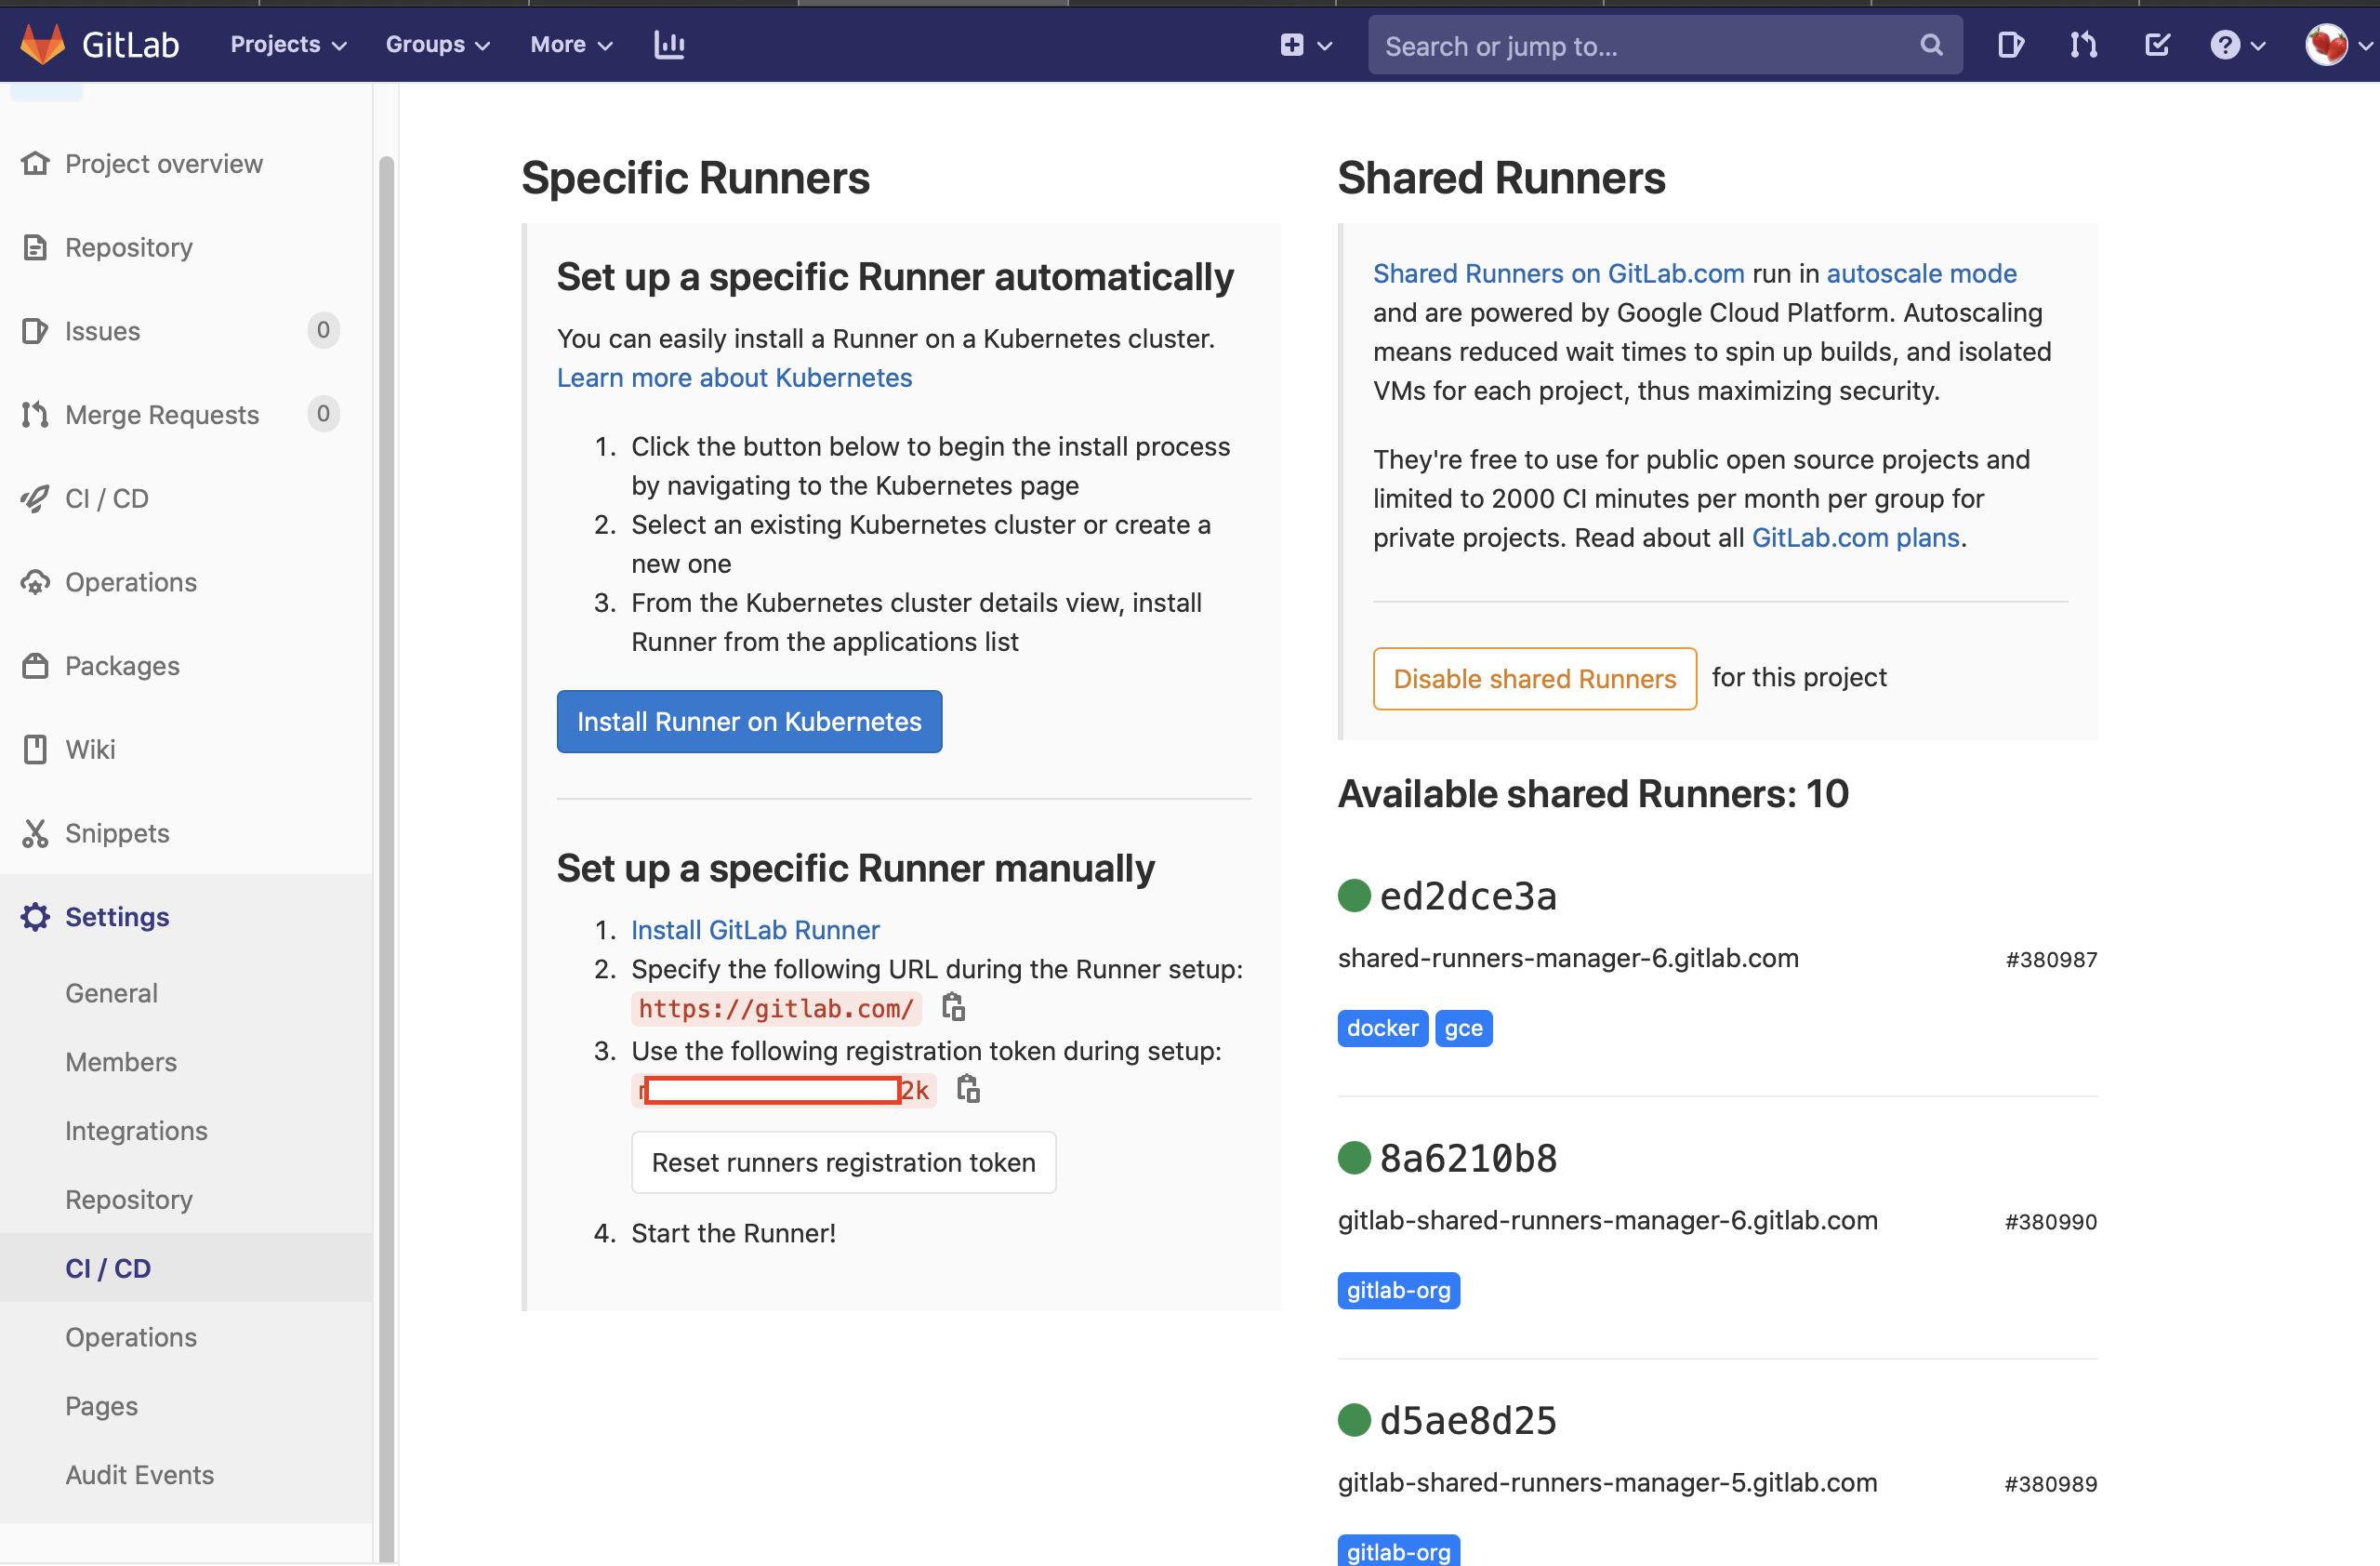
Gitlab Runner là thành phần cực kỳ quan trọng trong workflow Gitlab CI. Nếu không có Runner thì sẽ không có lệnh test, deploy nào được thực thi. Runner có nhiều loại, phân biệt dựa vào cái gọi là executor. Khi khởi tạo runner, bạn sẽ phải chọn nó là loại executor nào, và nó sẽ quyết định môi trường thực thi các câu lệnh trong file config ở trên. Bạn có thể tham khảo link https://docs.gitlab.com/runner/executors/ để biết sự khác nhau của các executor cũng như cách cài đặt, cấu hình chúng.
Trong repository setting, mục CI/CD, trên VPS mình chọn cài manual, excutor chọn Shell. Hoặc dùng luôn Share Runner mà không cần cài đặt cũng được.
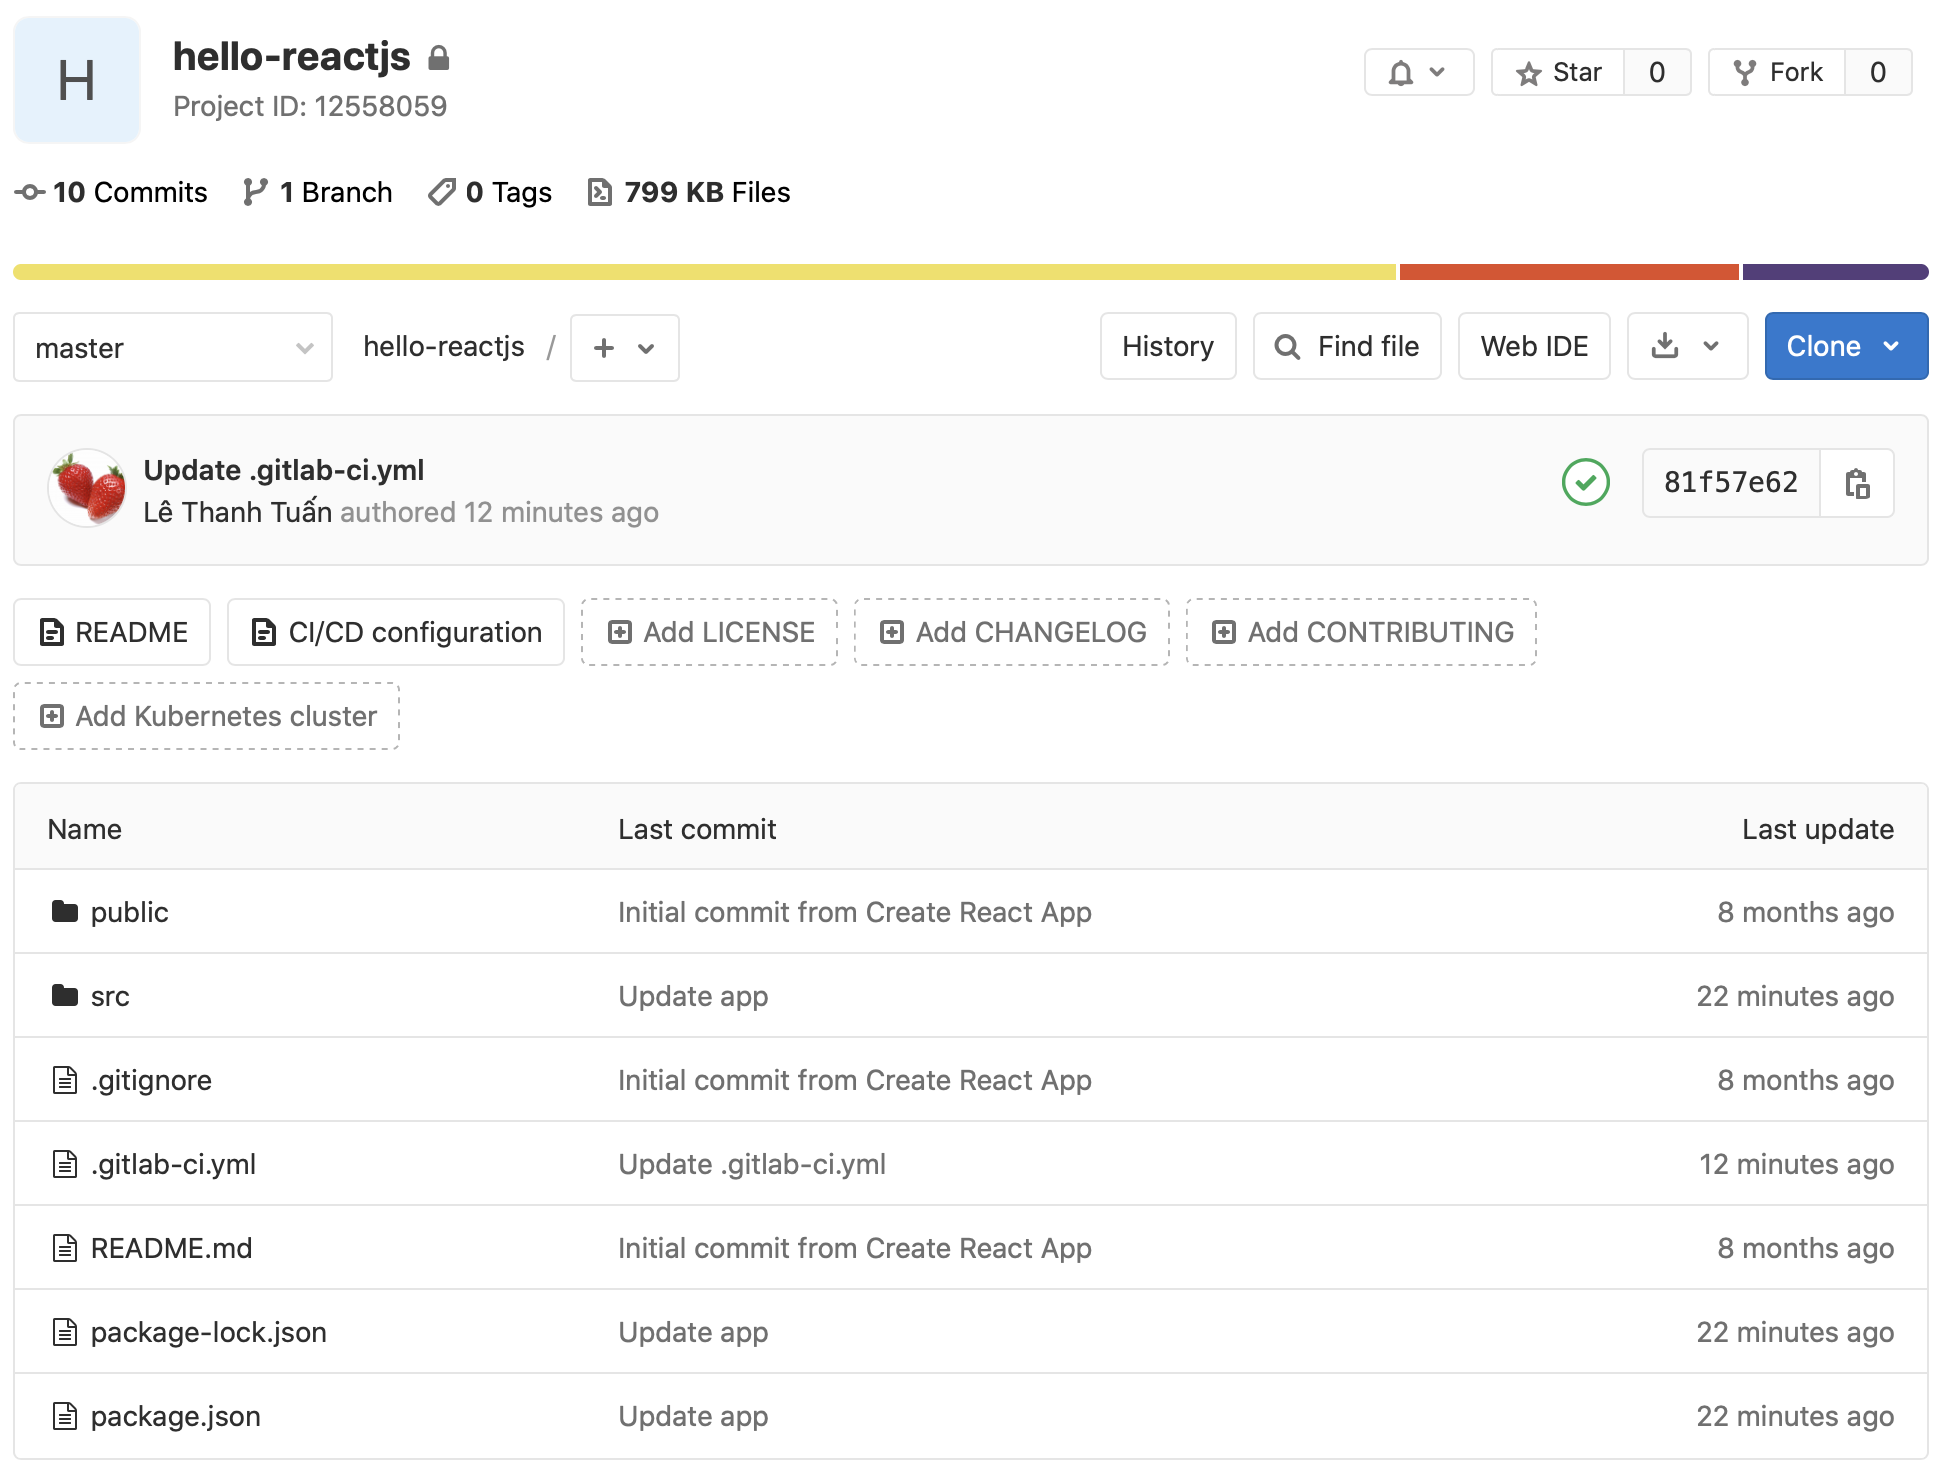
Đến đây tạm xong phần cài đặt cần thiết. Chúng ta sẽ quay lại repo trên Gitlab.
Thêm file .gitlab-ci.yml tại folder root trên Gitlab
Mặc định Gitlab không có cơ chế nào về CI cho dự án của bạn, chỉ khi nào dự án của bạn có file .gitlab-ci.yml nằm ở thư mục gốc thì Gitlab mới nhận dạng được dự án của bạn muốn áp dụng Gitlab CI. File này có định dạng và cần hợp lệ thì mới có thể hoạt động được, không thì khi bạn push code lên thì Gitlab sẽ báo lỗi file định dạng nội dung của file cấu hình không hợp lệ. Tham khảo cú pháp của cấu hình này tại https://docs.gitlab.com/ce/ci/yaml/
Chú ý phải đúng format. Bạn có thể sửa trực tiếp trên Gitlab, nó sẽ kiểm tra giúp file có đúng format hay không. Đoạn code dưới đây làm 2 việc. Đầu tiên build code từ branh master ra bản release. Câu lệnh npm run build –prod khá quen thuộc. Sau đó deploy lên production thông qua Rsync kết hợp SSH.
# Using the node image to build the React app
image: node:latest
variables:
PUBLIC_URL: /
# Cache node modules - speeds up future builds
cache:
paths:
- node_modules
stages:
- build
- deploy
build:
stage: build
script:
- npm install # Install all dependencies
- npm run build --prod # Build for prod
artifacts:
paths:
- build
only:
- master # Only run on master branch
deploy_production:
stage: deploy
image: ubuntu
before_script:
- 'which ssh-agent || ( apt-get update -y && apt-get install openssh-client -y )'
- eval $(ssh-agent -s)
- mkdir -p ~/.ssh
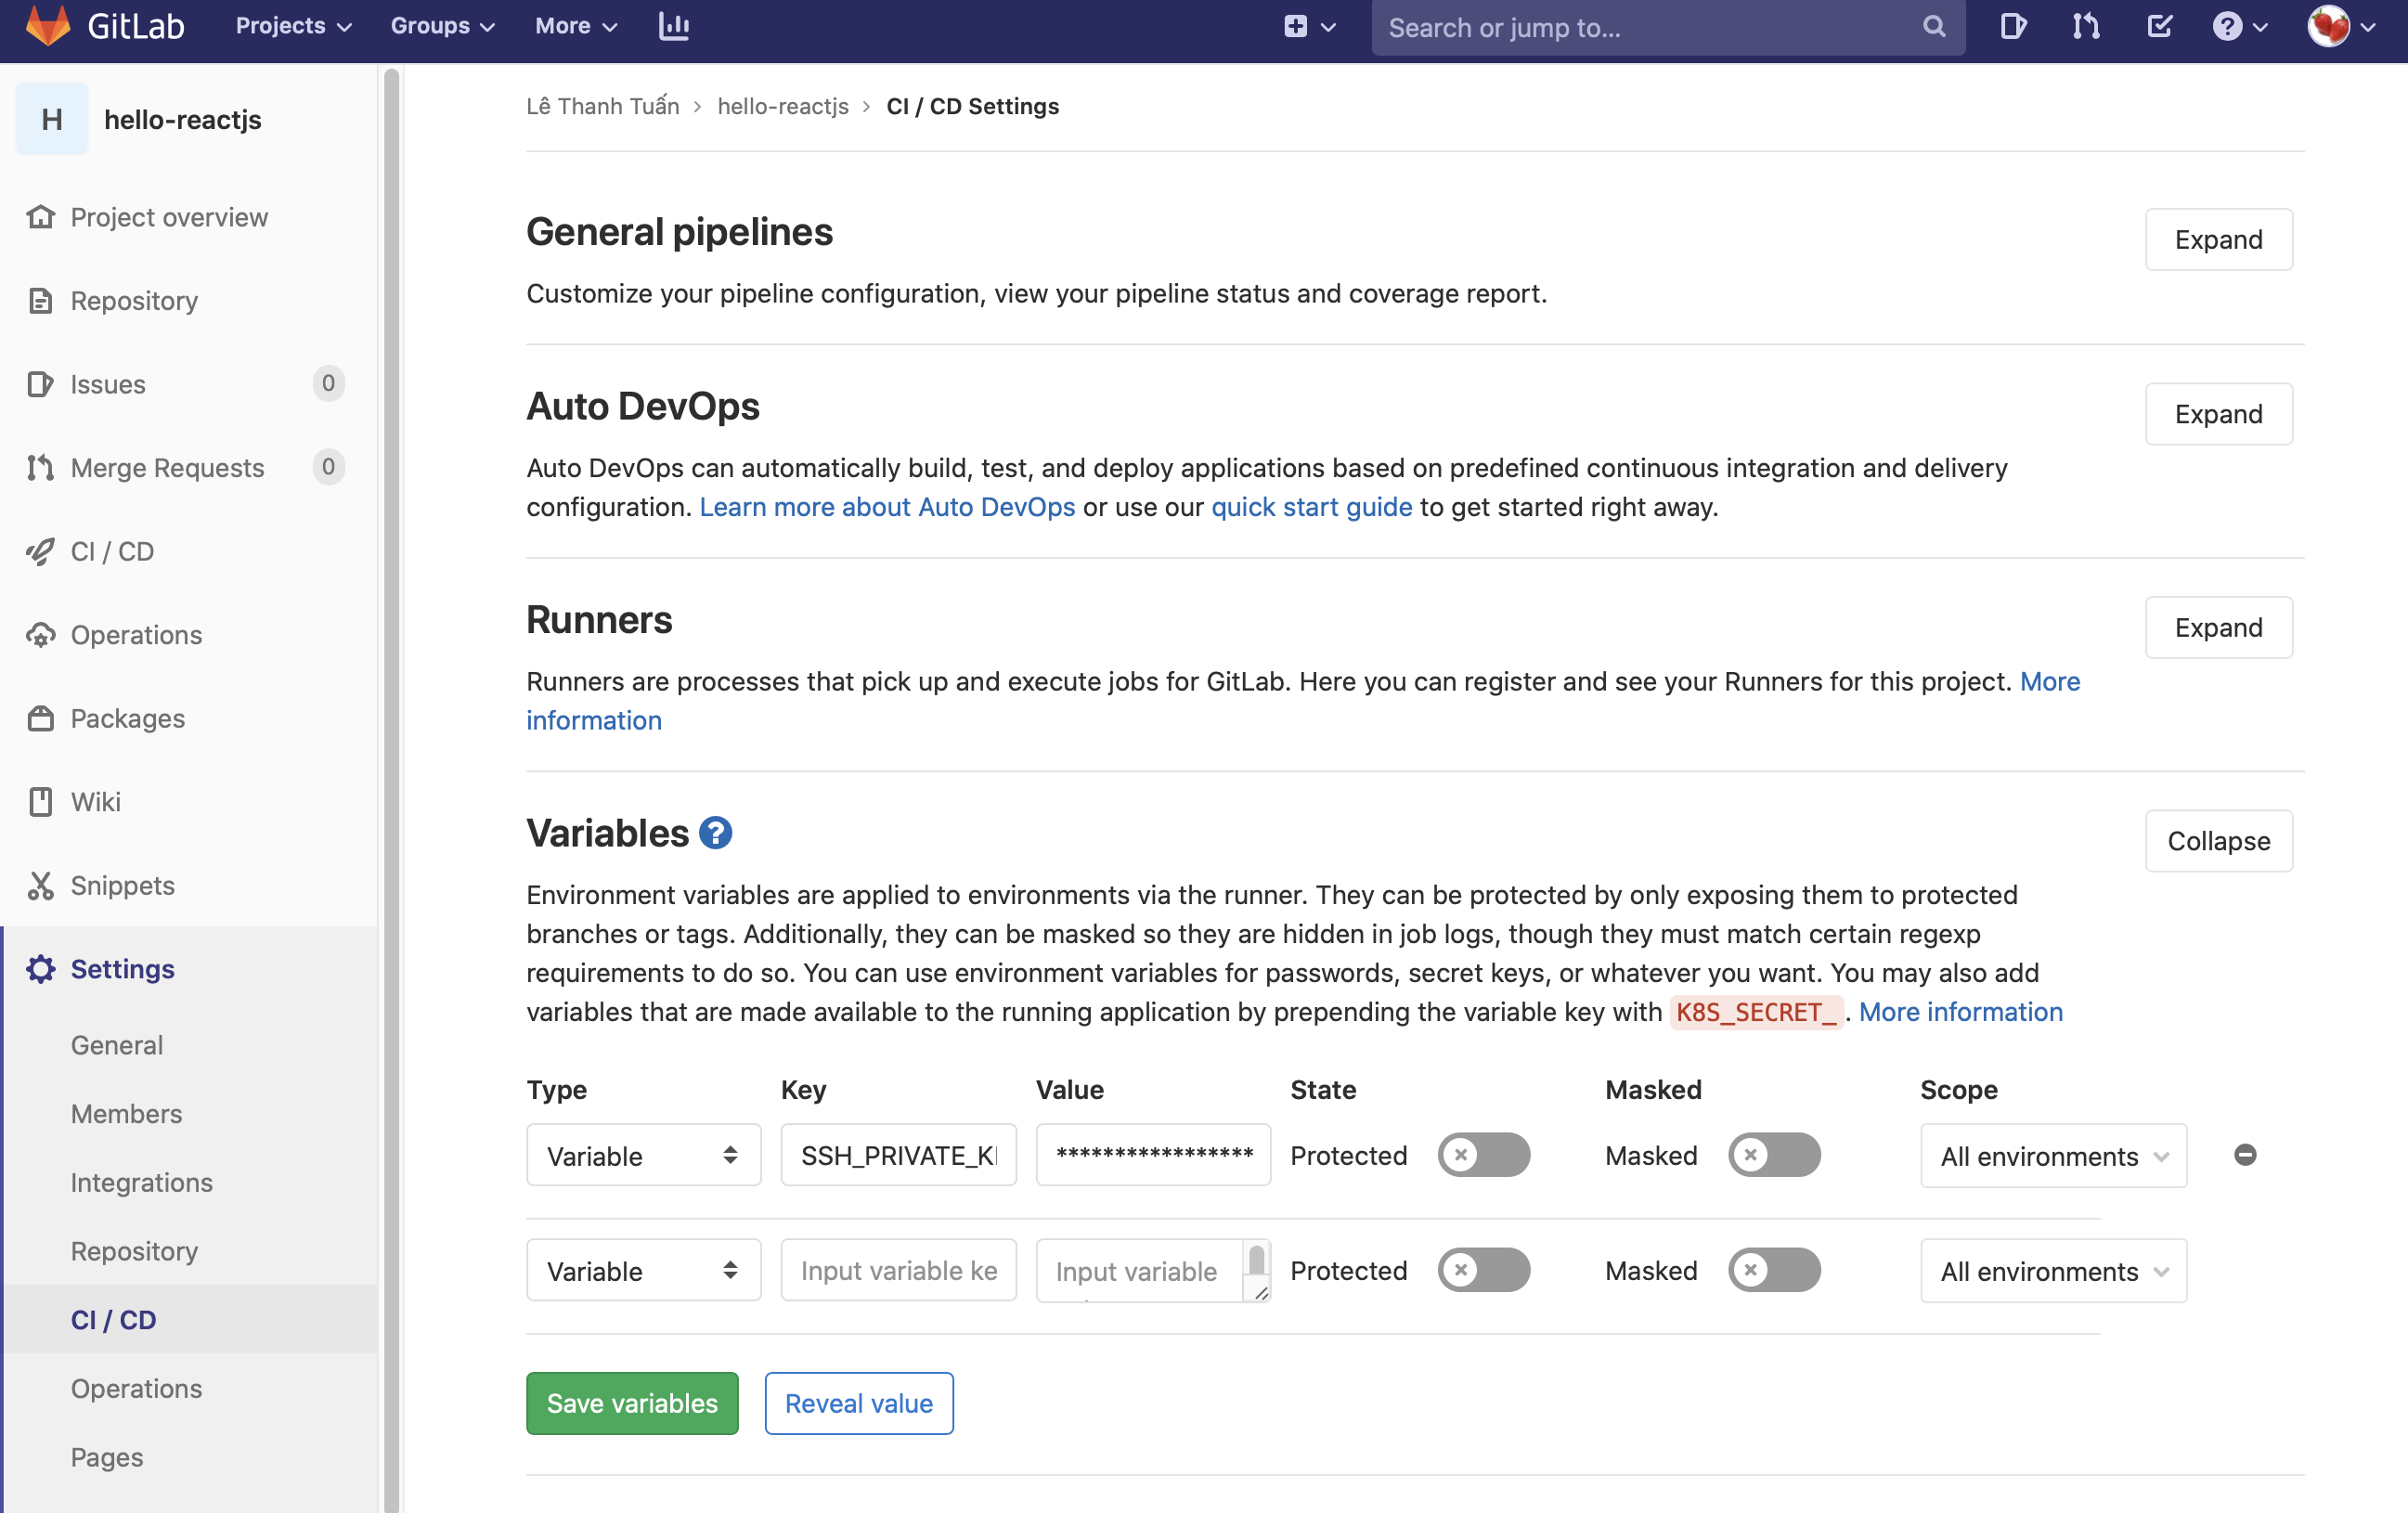
- echo "$SSH_PRIVATE_KEY" | tr -d '\r' > ~/.ssh/id_rsa
- chmod 700 ~/.ssh/id_rsa
- eval "$(ssh-agent -s)"
- ssh-add ~/.ssh/id_rsa
- ssh-keyscan -H 'gitlab.com' >> ~/.ssh/known_hosts
- apt-get install rsync -y -qq
- apt-get install curl -y -qq
script:
- echo "Deploying to server"
- ssh -i ~/.ssh/gitlab -o StrictHostKeyChecking=no USERNAME@IP-HOST -p PORT
- rsync -avz --progress -a -e "ssh -p PORT" build/ USERNAME@IP-HOST:/home/www/noithatrongviet.com/public_html
- echo "Deployed"
environment:
name: production
url: http:noithatrongviet.com
only:
- master # Only run on master branch
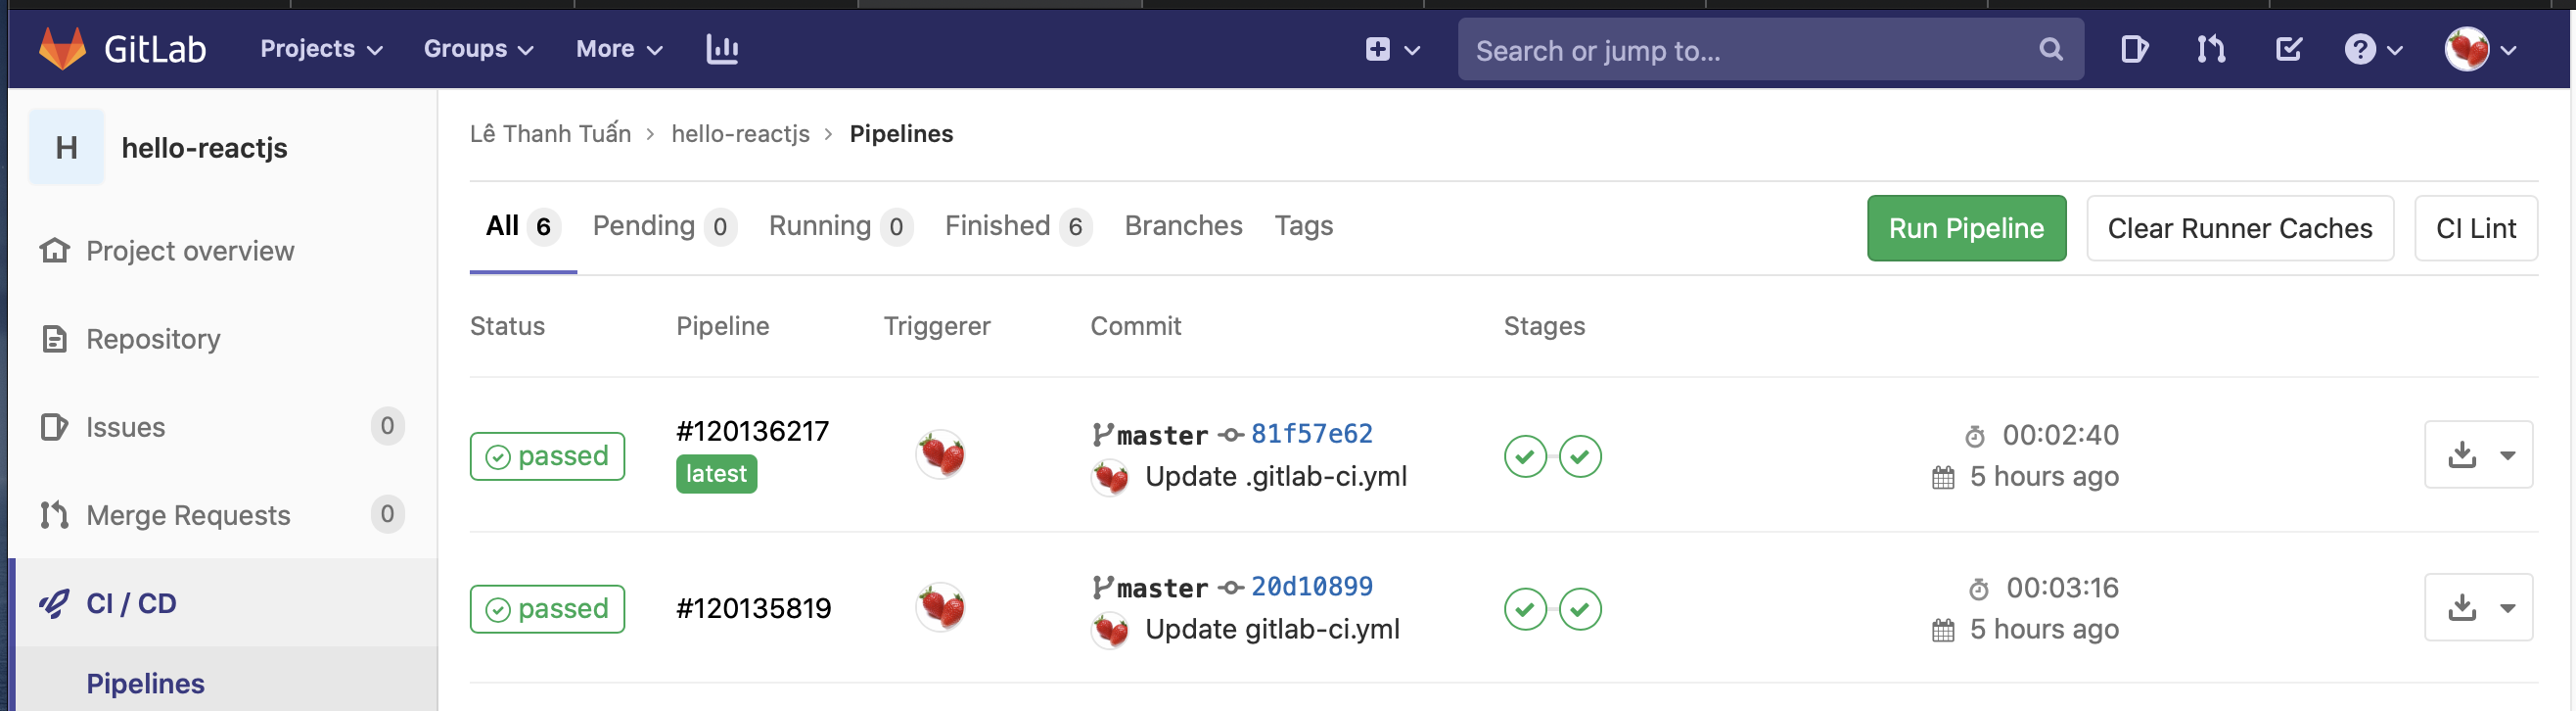
Chú các thông tin quan trọng: USERNAME@IP-HOST PORT là thông tin tên đăng nhập, port SSH của bạn. /home/www/noithatrongviet.com/public_html thay = đường dẫn trên host của bạn. Xong nhấn nút Commit và vào mục CI/CD -> Pipelines hoặc CI/CD -> Jobs kiểm tra kết quả của bạn.Tận hưởng thành quảChúc các bạn thành công. Từ nay cứ commit code là Gitlab tự động build và deploy lên host cho bạn, quá đã phải không.
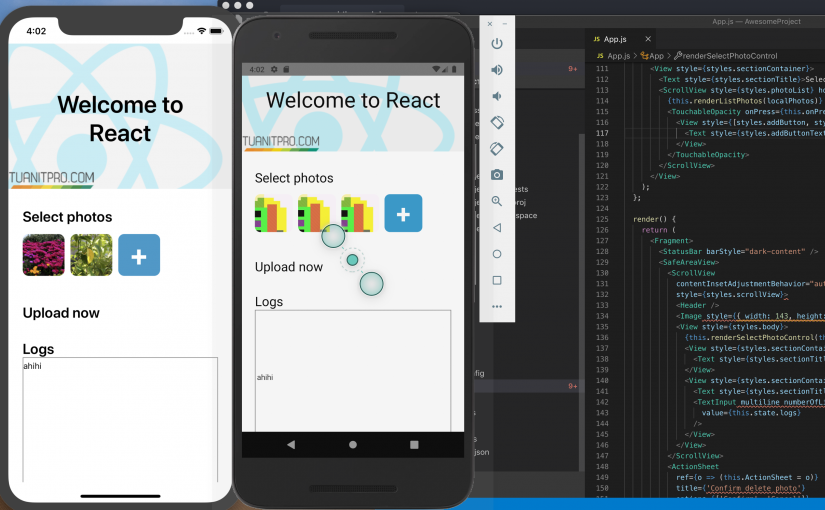
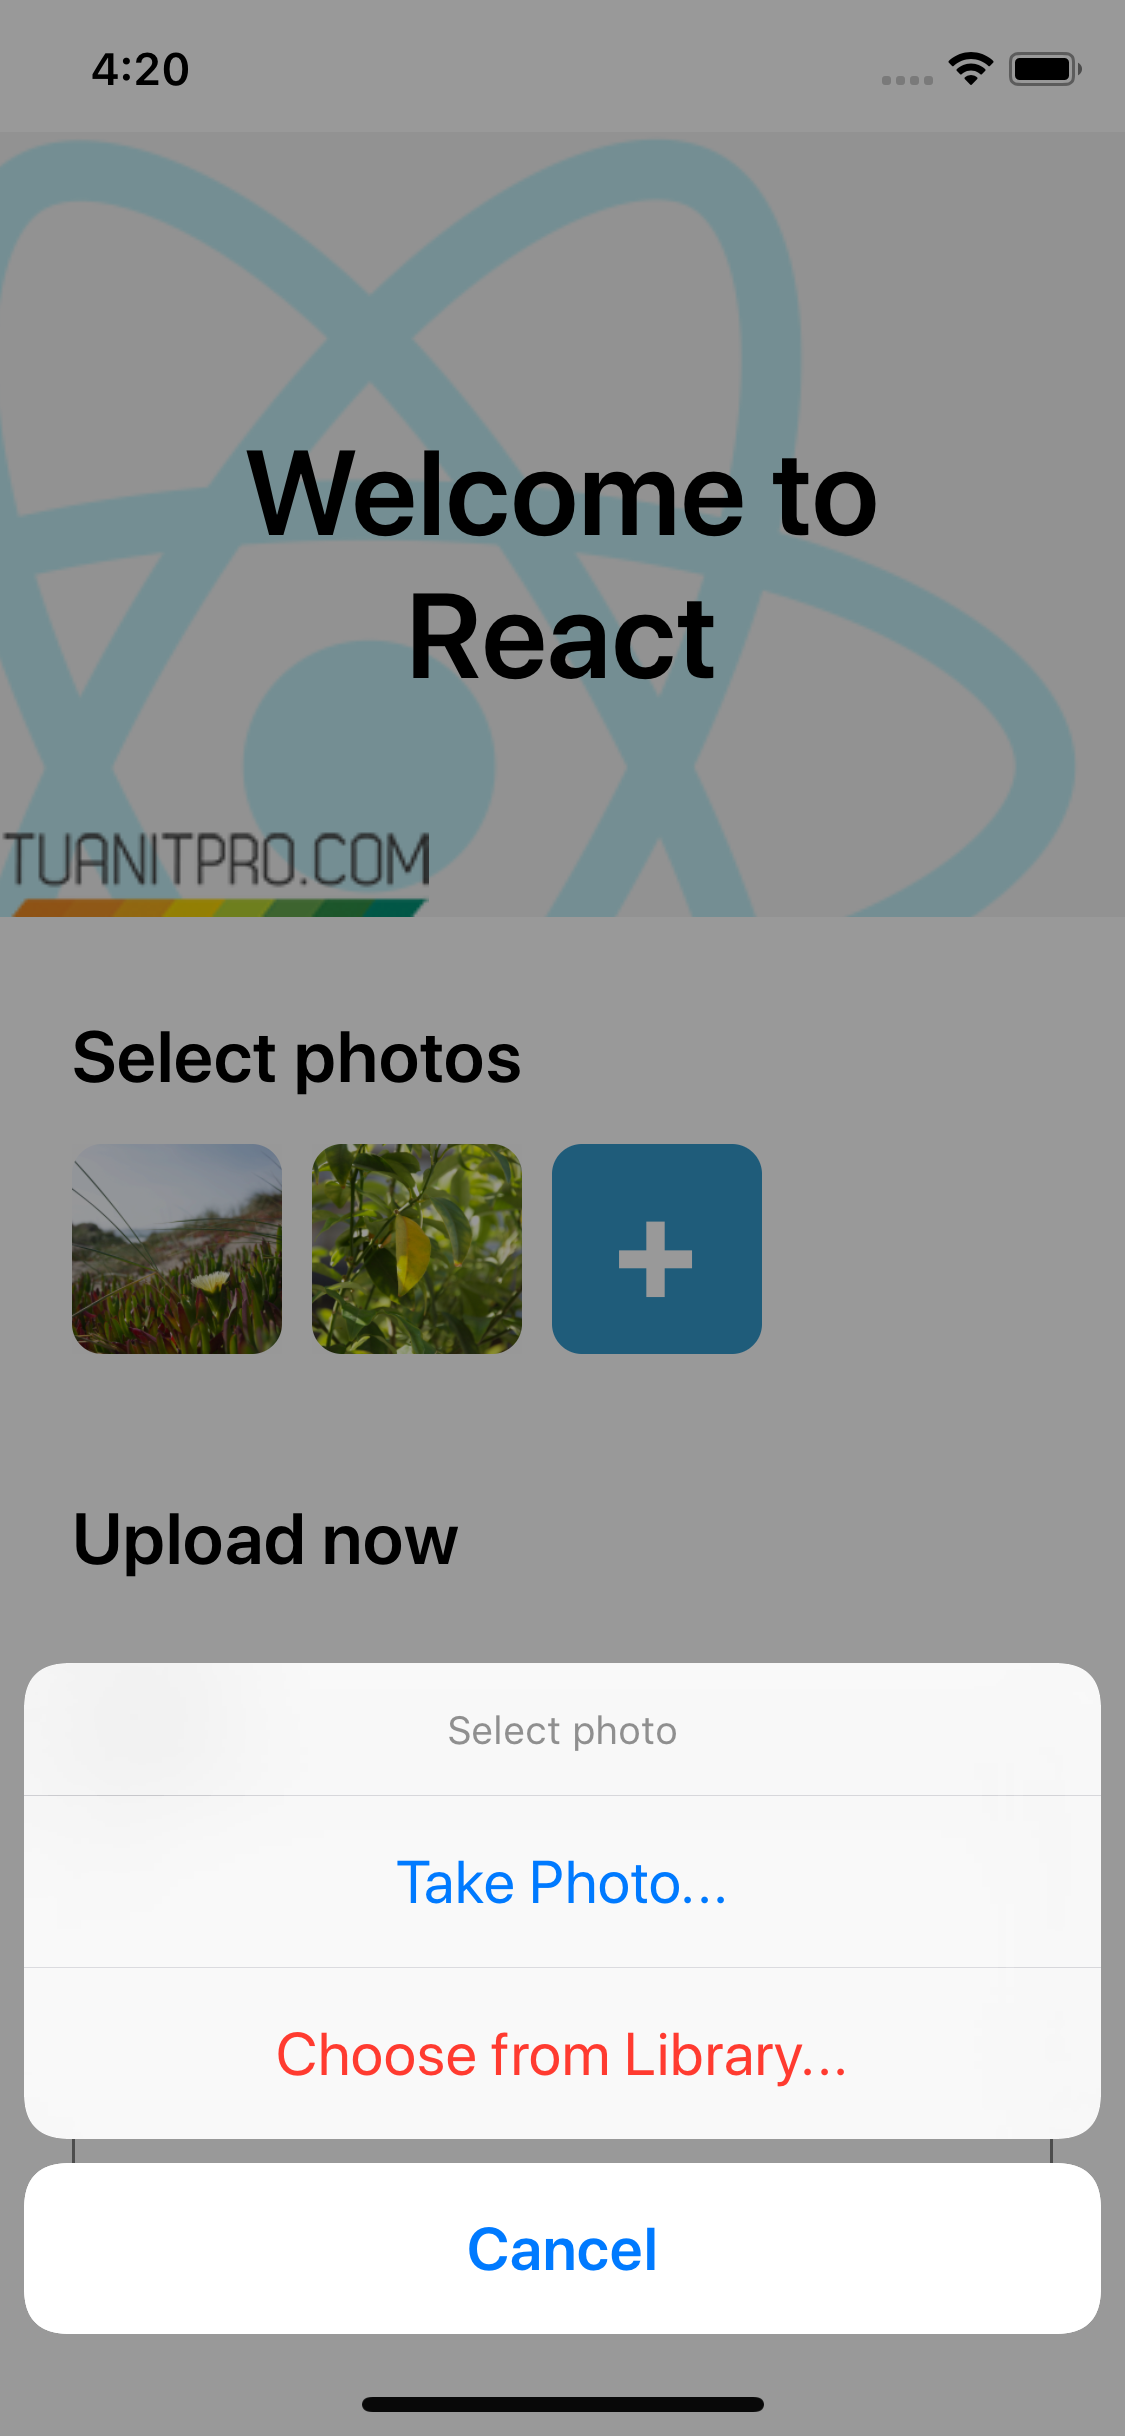
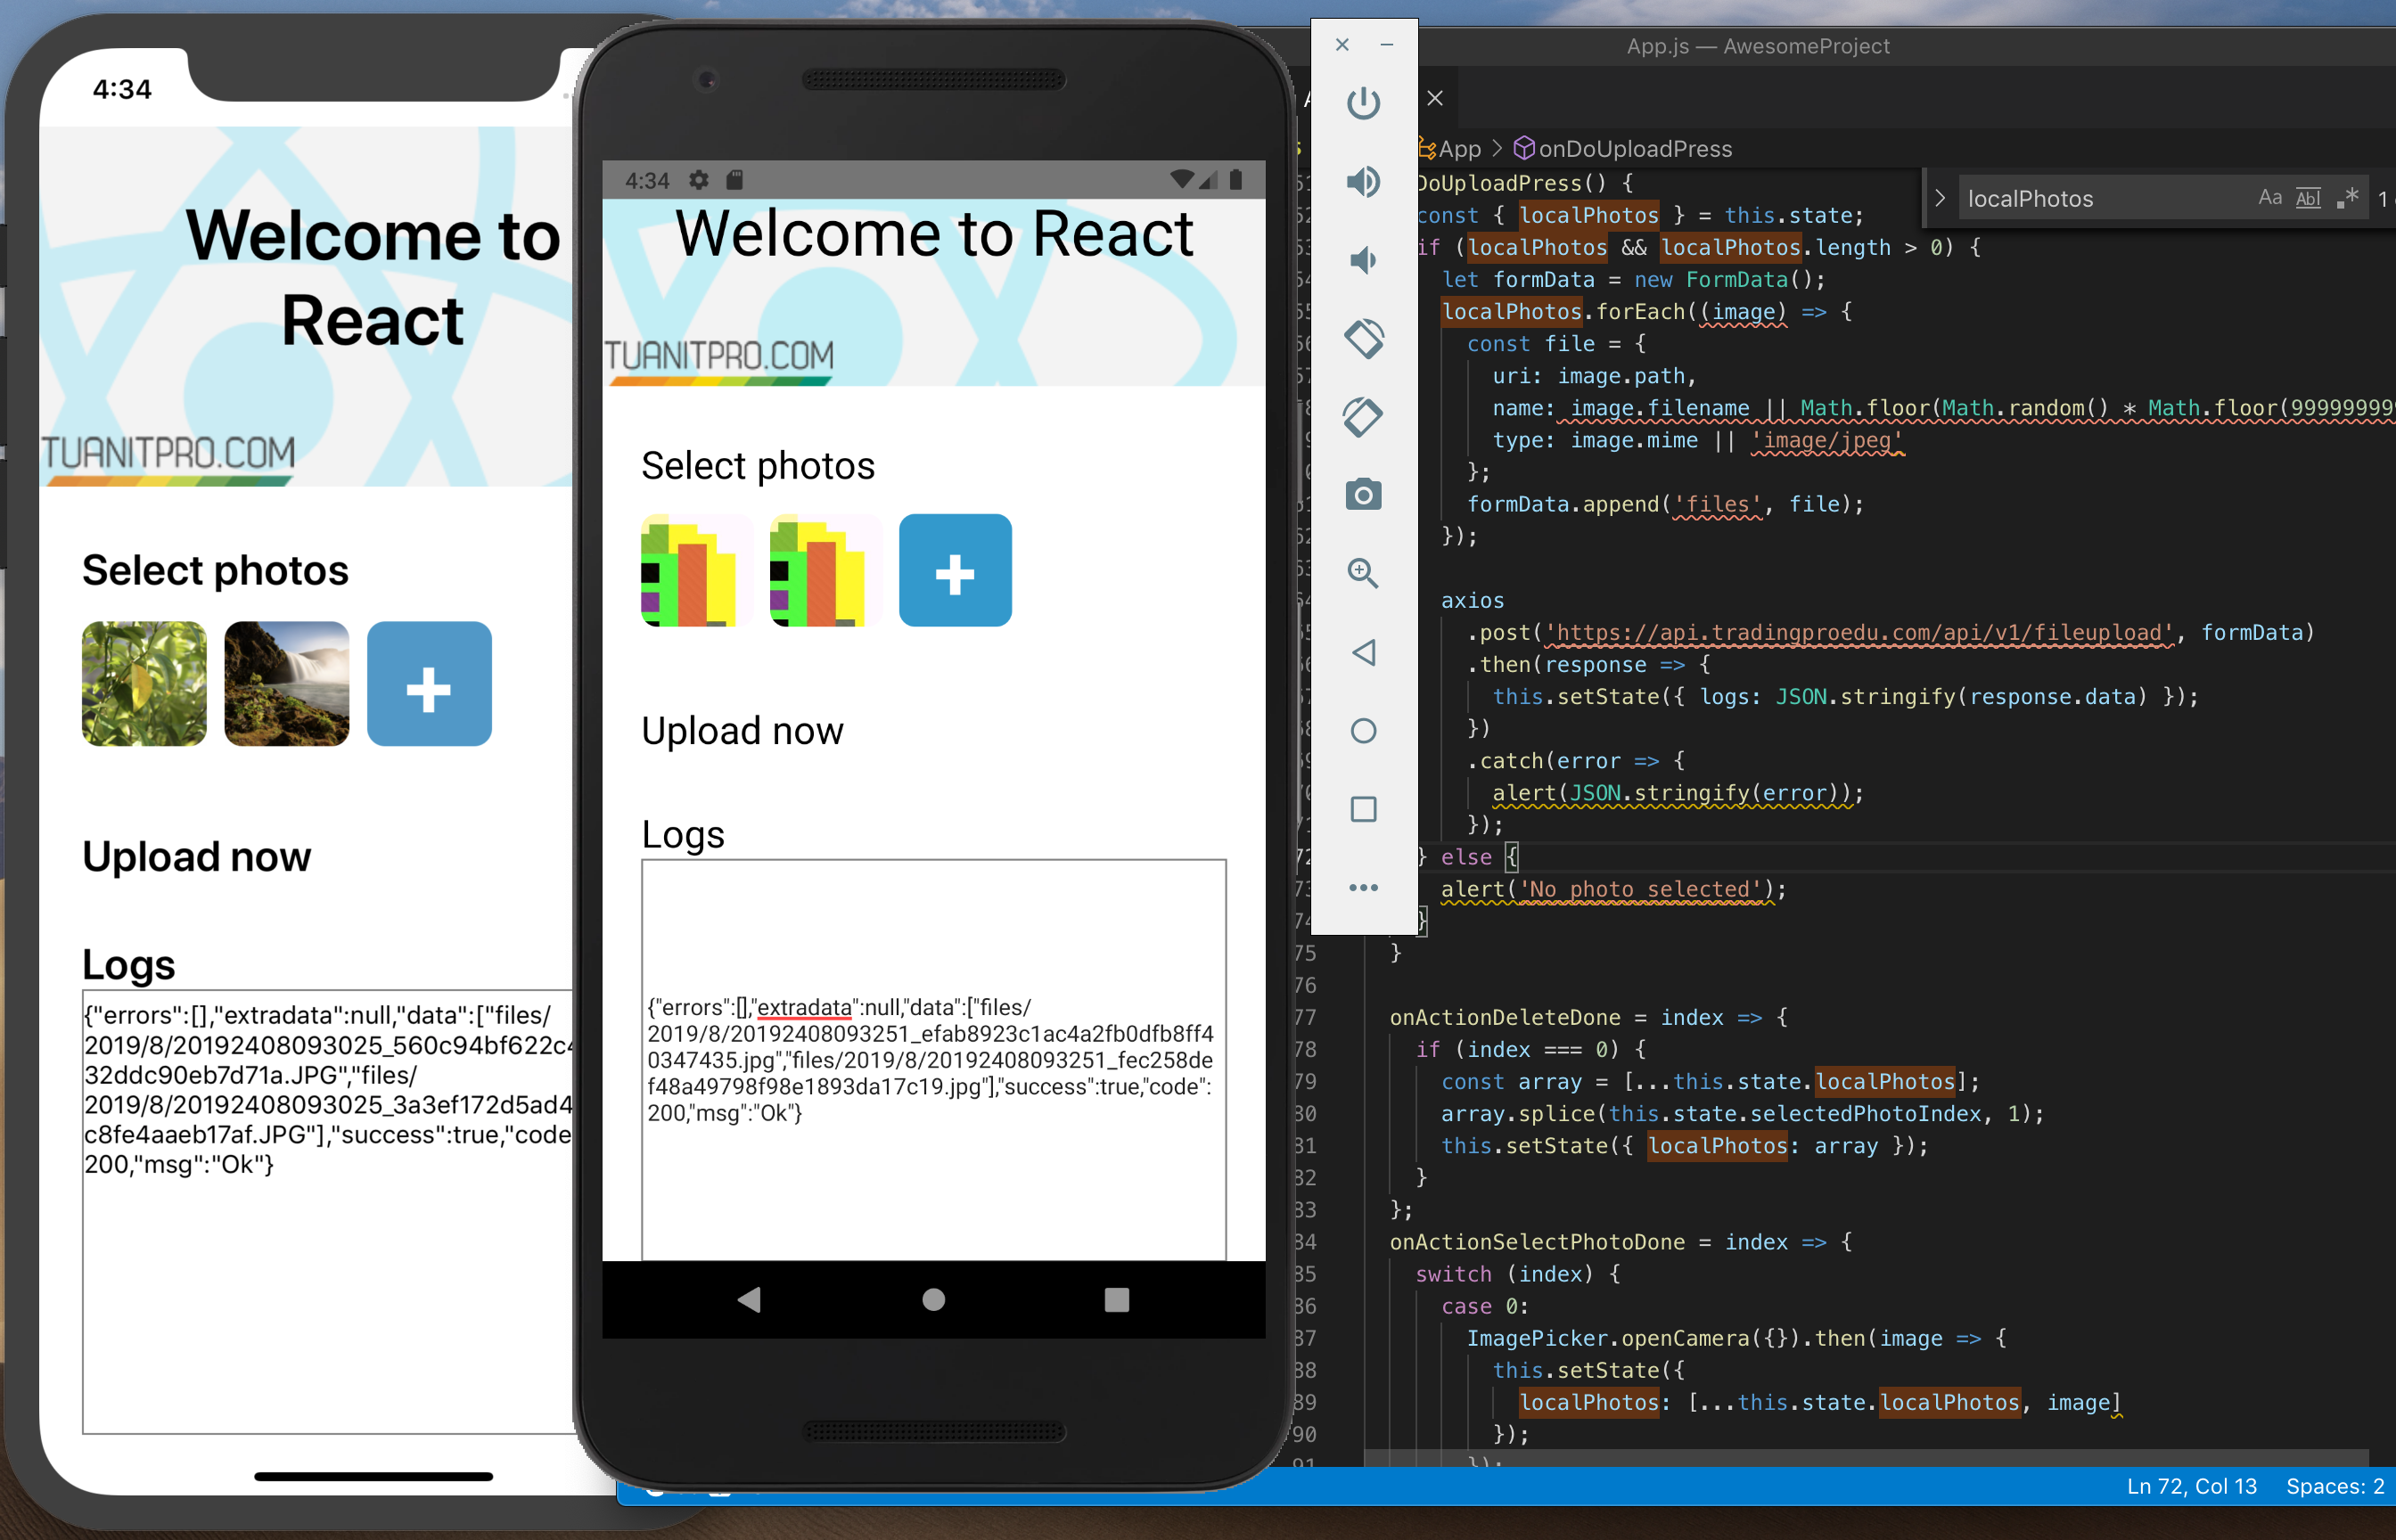
Khi lập trình ứng dụng mobile, có khá nhiều thứ liên quan đến hình ảnh. Hướng dẫn sau đây sẽ giúp bạn có thể upload nhiều hình ảnh trong app React Native, tương tự Facebook hay instagram…
Chuẩn bị
Trong hướng dẫn này sử dụng api code dot.net core. Bạn có thể sử dụng ngôn ngữ khác như nodejs, php, java… Bạn có thể tham khảo thêm tại đây.
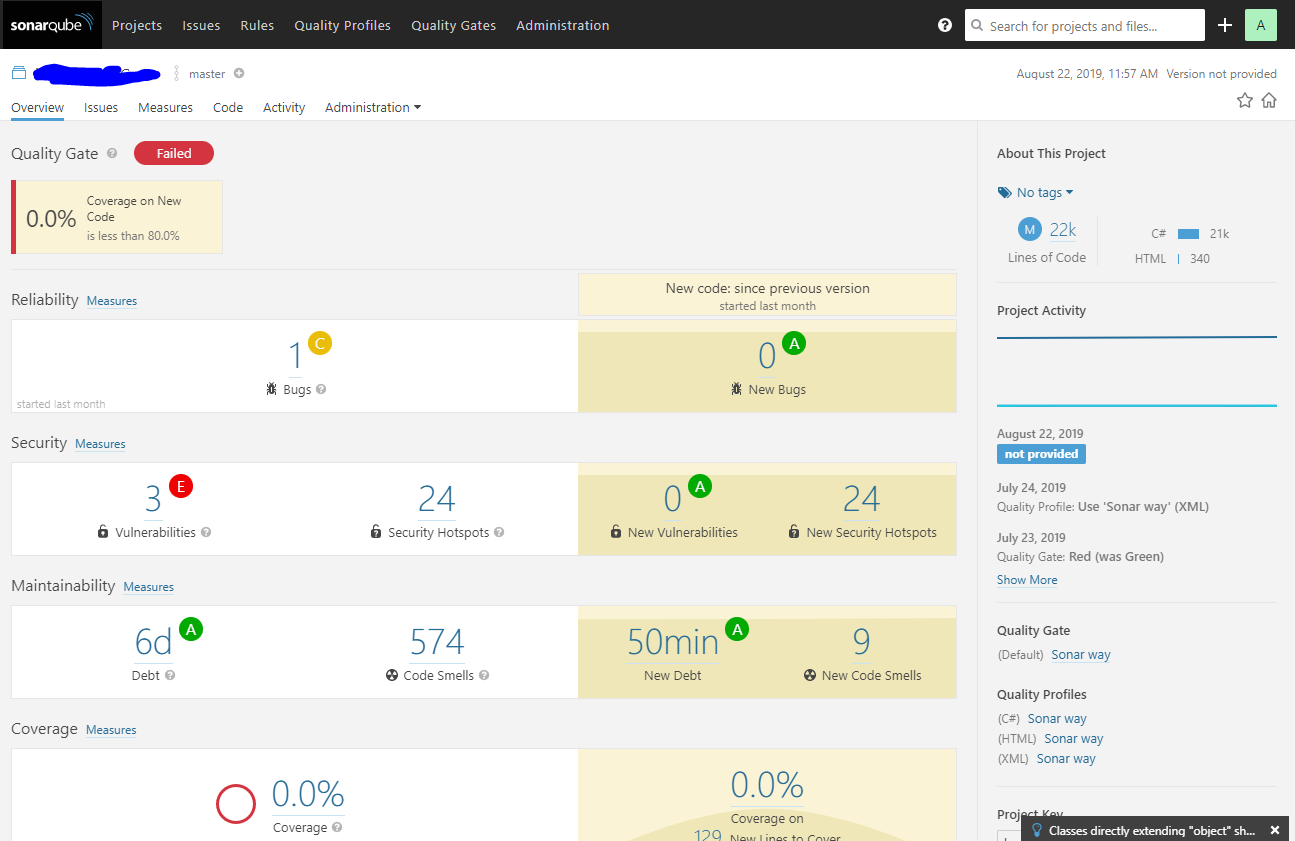
Trong quá trình lập trình & phát triển phần mềm chúng ta thường hay gặp vấn đề về quản lý chất lượng code, code smell, dirty code hay technical debt, thậm chí tồn tại lỗ hổng bảo mật. Nhất là khi dự án có sự tham gia của nhiều member, với trình độ kinh nghiệm khác nhau. Hoặc khi dự án chưa có rules, coding conventions, coding styles rõ ràng. Đến một ngày nào đó cần maintainance dự án hay develop thêm feature mới, chúng ta mới giật mình nhìn lại đống code cũ, tại sao nó lại tệ hại như vậy.
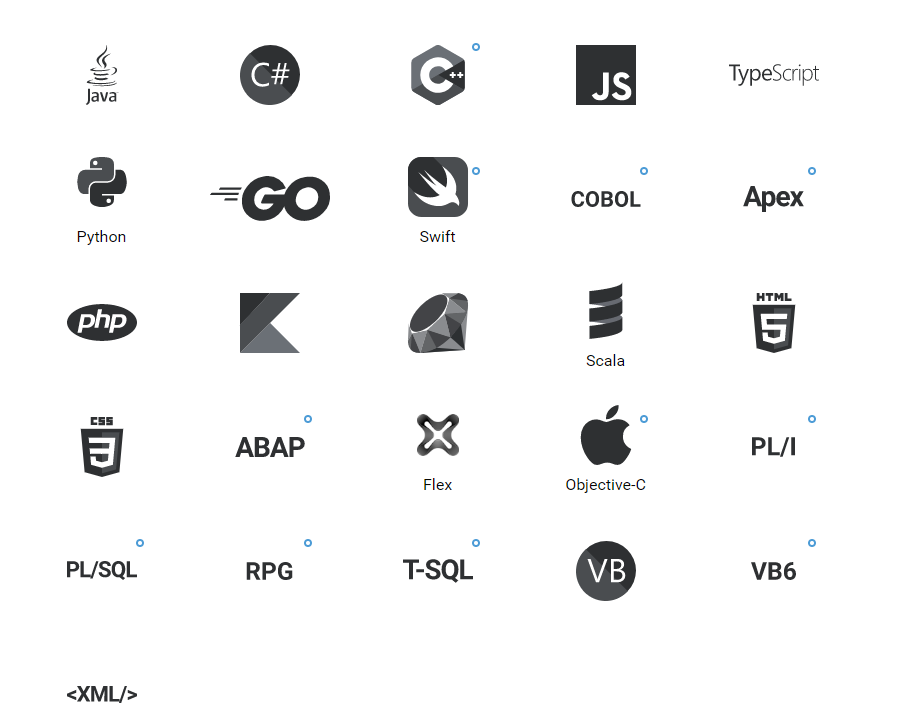
SonarQube là một open source platform, được phát triển bởi SonarSource dành cho việc kiểm tra liên tục chất lượng code (code quality), review code một cách tự động để phát hiện ra các bugs, code smell, lỗ hổng bảo mật cho 25+ ngôn ngữ lập trình khác nhau. SonarQube hỗ trợ báo cáo duplicated code, coding standards, unit tests, code coverage, code complexity, comments, bugs, and security vulnerabilities.
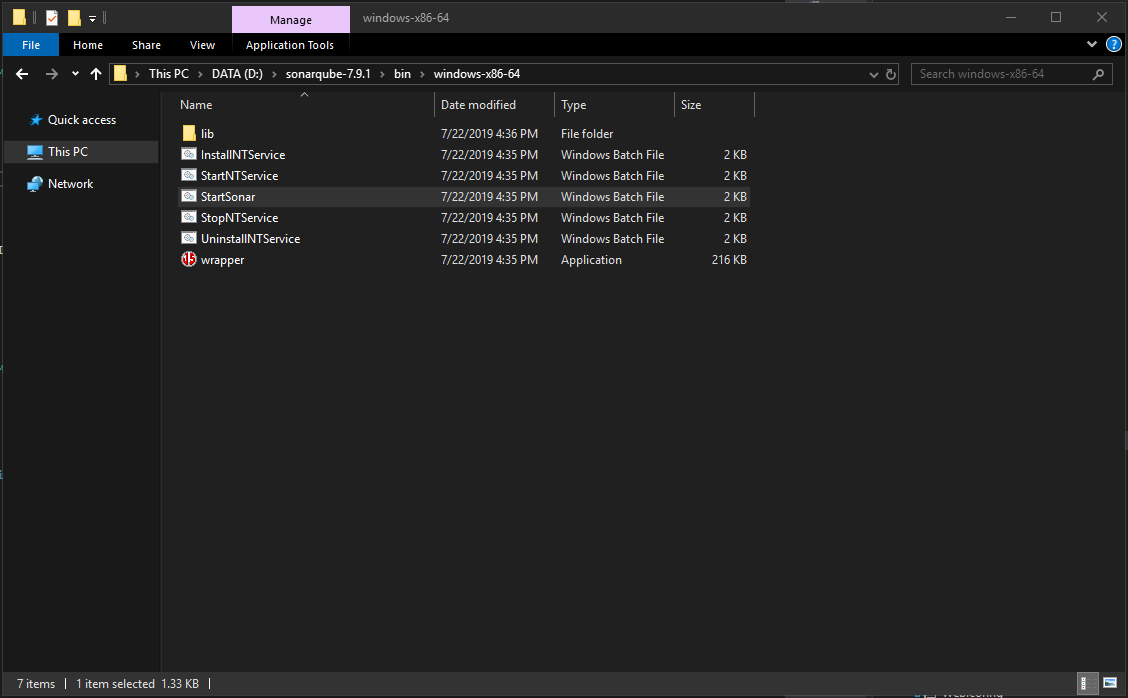
Đầu tiên vào https://www.sonarqube.org/downloads/ chọn bản Community (miễn phí). Giải nén và tìm thư mục bin để chạy. Đối với Windows có thể cài thành service để tiện sử dụng.
Nếu gặp lỗi liên quan JAVA, các bạn chú ý cài lại Java JDK. Sau đó tìm conf/wrapper.conf sửa lại dòng sau:
Truy cập: http://localhost:9000 username/password: admin/admin để kiểm tra. Nếu thành công thì chúng ta xong bước cài đặt. Tiếp theo tích hợp dự án vào SonarQube để phân tích.
Tích hợp dự án của bạn vào SonarQube
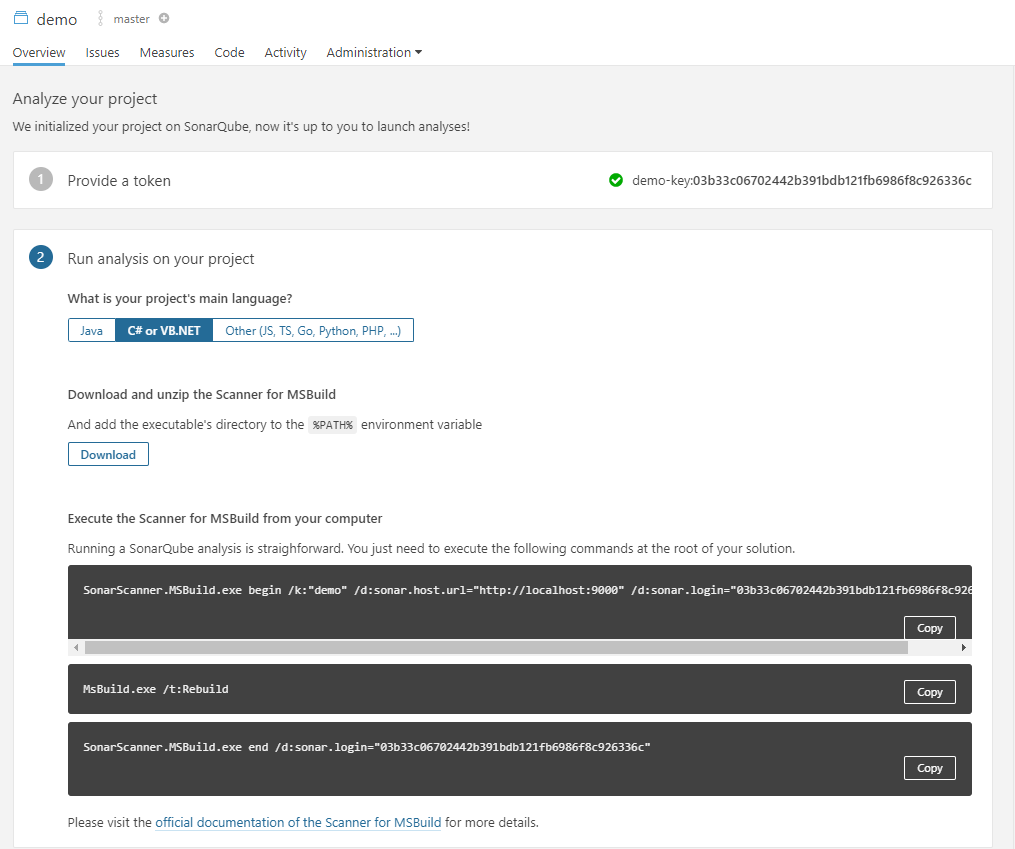
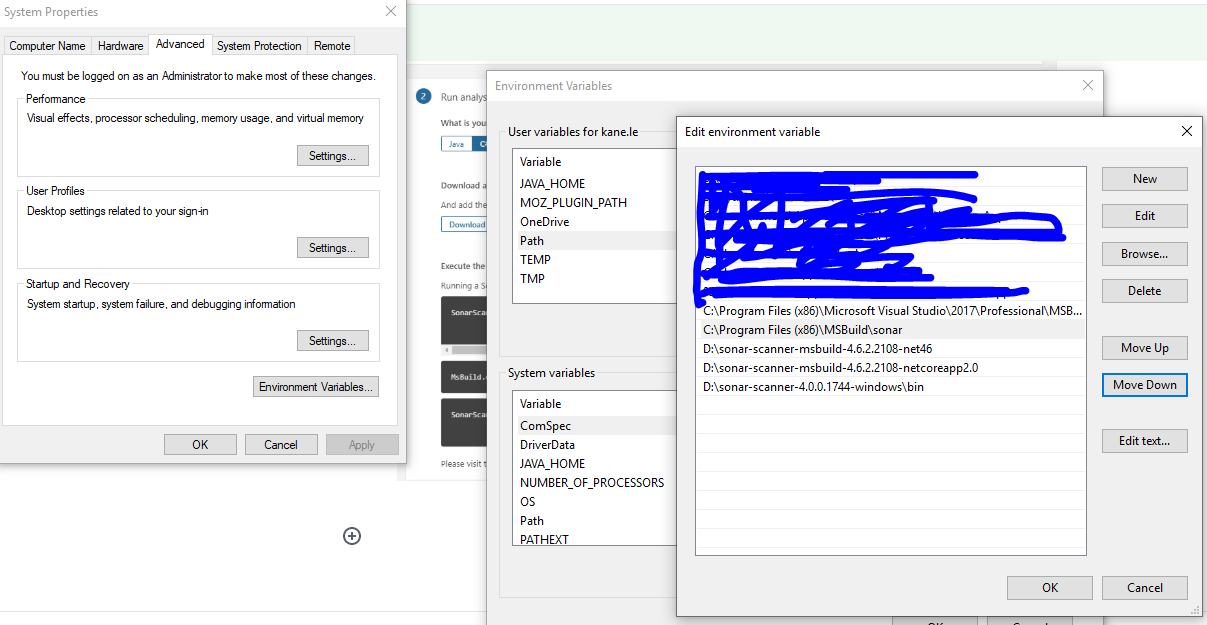
Sau khi đăng nhập thành công, click vào http://localhost:9000/projects/create để tạo dự án mới. Nhập key & tên dự án, sau đó chuyển sang màn hình nhập key, chọn loại dự án của bạn, và download file scanner của nó về, giải nén và thêm vào biến môi trường %PATH%. Ví dụ mình làm về Windows, dot net core và reactjs thì cần
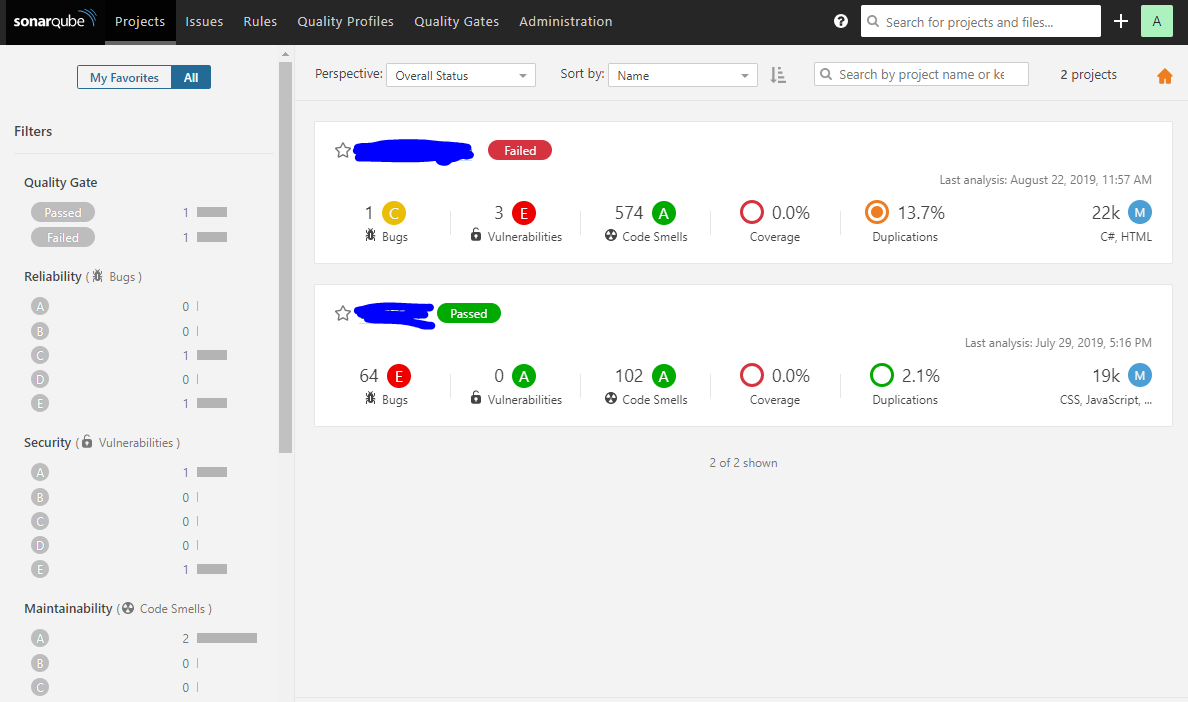
Sau đó mở project của bạn và chạy câu lệnh theo hướng dẫn để sonarqube phân tích.
SonarScanner.MSBuild.exe begin /k:"KEY_CUA_BAN" /d:sonar.host.url="http://localhost:9000" /d:sonar.login="API_KEY_CUA_BAN"

MsBuild.exe /t:Rebuild

SonarScanner.MSBuild.exe end /d:sonar.login="API_KEY_CUA_BAN"
Hướng dẫn này cho phép bạn có thể download một file ((image,video,zip,pdf,doc,xls,ect) từ một đường dẫn url trên website khác, lưu vào ổ cứng hoặc server của bạn. Demo dưới đây viết bằng ASP.NET C#, sẽ lấy ảnh theo đường dẫn http://tuanitpro.com/wp-content/uploads/2014/09/cardvisit.jpg sau đó lưu và thư mục được chỉ định (thư mục Uploads)
 public virtual int Update(T entity, params Expression<func<t, object="">>[] properties)
        {
            if (entity.Id < 1)
            {
                return Insert(entity).Id;
            }
            if (properties?.Any() == true)
            {
                _dbContext.Attach(entity);
                foreach (var prop in properties)
                {
                    _dbContext.Entry(entity).Property(prop).IsModified = true;
                }
            }
            else
            {
                _dbContext.Entry(entity).State = EntityState.Modified;
            }

            return _dbContext.SaveChanges();
        }

        public virtual int Update(T entity, object replaceBy)
        {
            if (entity.Id < 1)
            {
                return Insert(entity).Id;
            }
            if (replaceBy == null)
            {
                return _dbContext.SaveChanges();
            }

            var properties = replaceBy.GetType().GetProperties(BindingFlags.Public | BindingFlags.Instance);
            if (properties?.Any() == true)
            {
                foreach (var prop in properties)
                {
                    var valueOfProp = prop.GetValue(replaceBy, null);
                    var propOfEntity = entity.GetType().GetProperty(prop.Name);
                    propOfEntity.SetValue(entity, Convert.ChangeType(valueOfProp, propOfEntity.PropertyType), null);

                    _dbContext.Entry(entity).Property(propOfEntity.Name).IsModified = true;
                }
            }
            else
            {
                _dbContext.Entry(entity).State = EntityState.Modified;
            }

            return _dbContext.SaveChanges();
        }
</func<t,>
Using
var contact = new Contact { Id = 1, FullName = "Le Thanh Tuan" };

var rs1 = contactService.Update(contact, x => x.FullName);

var rs2 = contactService.Update(contact, new
{
	Id = 1,
	Phone = "0976060432",
	UserName = "tuanitpro",
	FullName = "Le Thanh Tuan"
});
Khi phát triển dự án, chúng ta luôn mong muốn sản phẩm làm ra chạy thật ngon, không lỗi, không phàn nàn từ khách hàng.
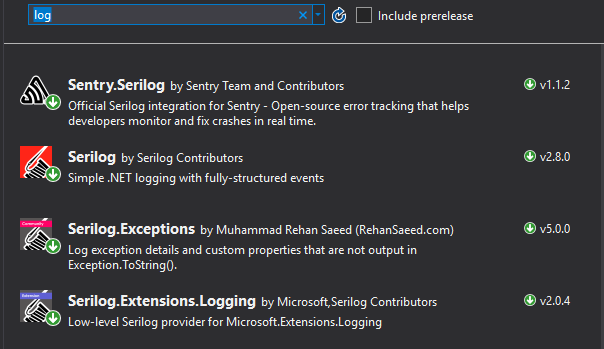
Tuy nhiên đời không như mơ, đôi khi sự cố vẫn xảy ra. Chính vì vậy logging là việc cần thiết, và cũng có nhiều công cụ hỗ trợ cho việc đó. Trong phạm vi bài viết này, các bạn sẽ được biết thêm một công cụ log ngon lành đơn giản dành cho .NET Core & ReactJs. Đó là https://serilog.net, http://sentry.io. Nếu bạn quan tâm thêm thì có thể tìm hiểu về log4net, nlog…. Có bài viết so sánh tại https://stackify.com/nlog-vs-log4net-vs-serilog/
Bản thân mình đánh giá thằng serilog ngon, mạnh mẽ, dễ áp dụng vào dự án. Nó hỗ trợ rất nhiều loại log: file, console, sentry, elasticsearch…
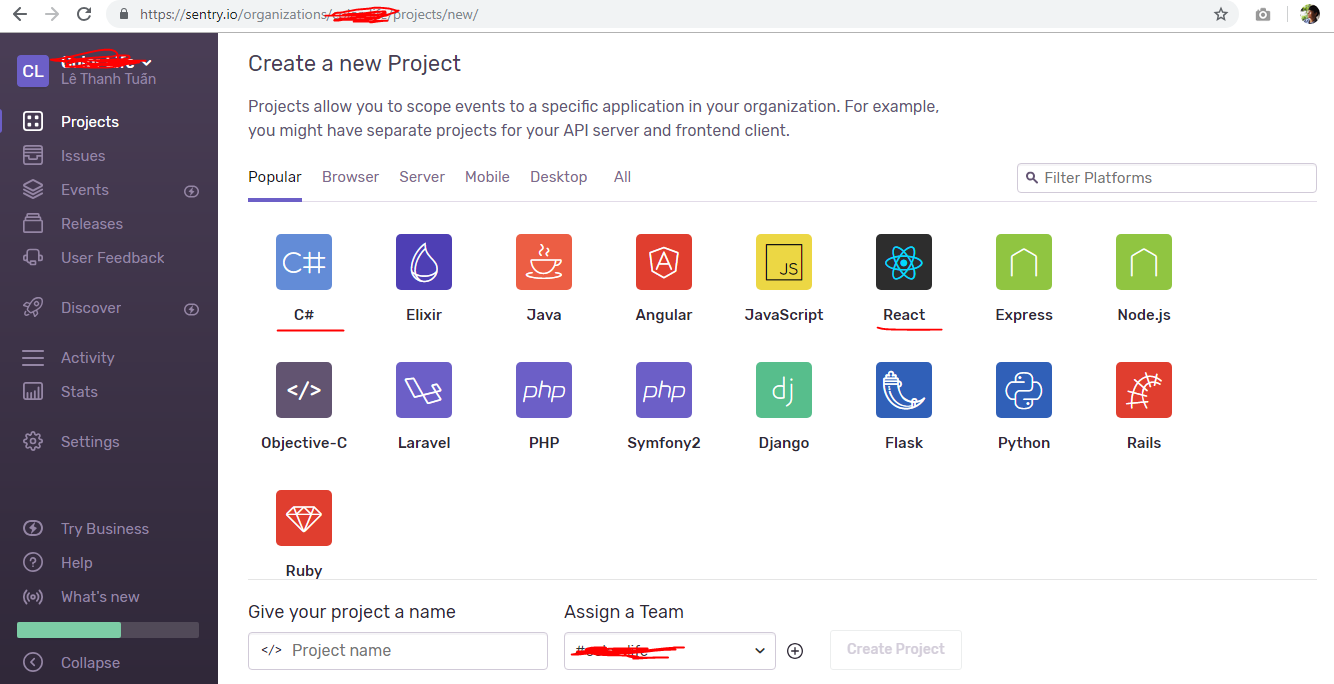
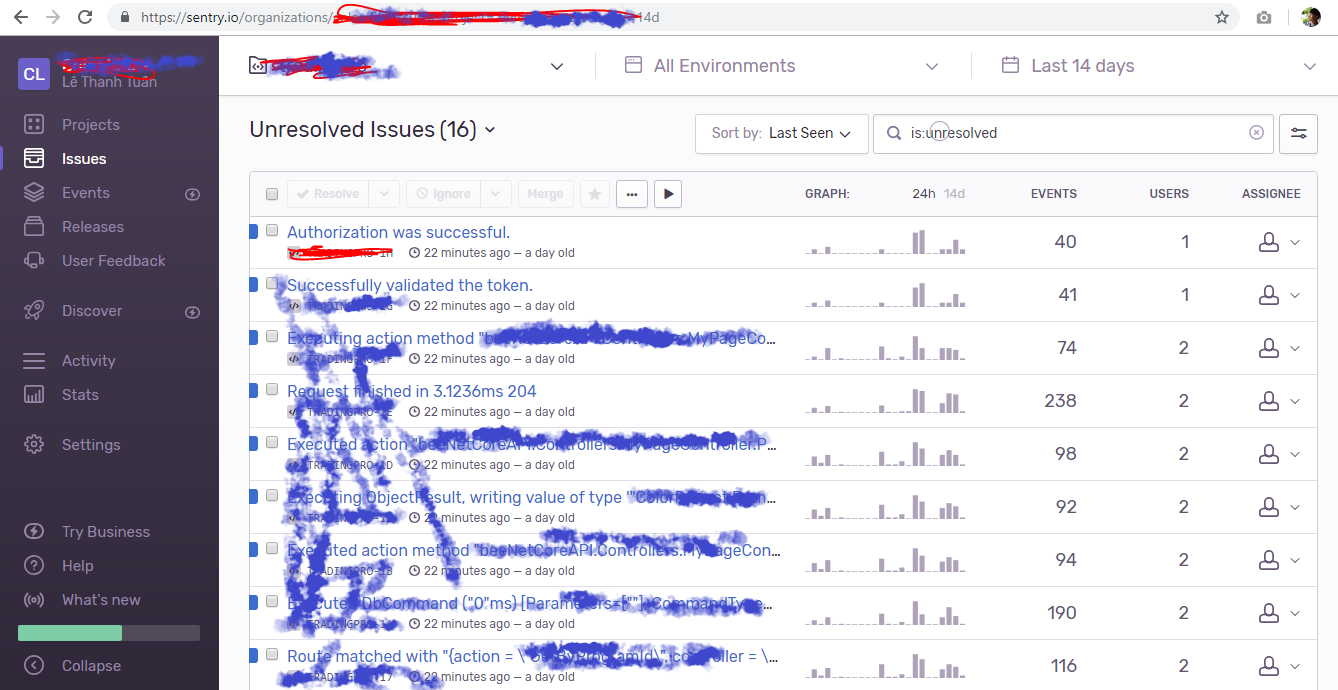
Sentry.io hiểu đơn giản như một database lưu trữ & cung cấp theo dõi tất cả log của chúng ta. Có bản free, gửi email khi có issue. Đánh giá ngon. Muốn ngon hơn nữa thì dùng bản trả phí. Tuy nhiên bản miễn phí cũng đủ dùng cho dự án nhỏ rồi.
Việc áp dụng khá đơn giản, chúng ta sẽ bắt đầu với dự án ASP.NET Core trước.
Việc đăng ký tạo project trên nó khá đơn giản. Sau khi đăng ký nó sẽ cho bạn một đoạn mã DNS để thêm vào project. Đăng ký tài khoản sentry & tạo project.
Logging with Serilog, Sentry, ASP.NET Core and ReactJs
Logging with Serilog, Sentry, ASP.NET Core and ReactJs
Logging with Serilog, Sentry, ASP.NET Core and ReactJs
Cấu hình sentry vào project. File Program.cs
public class Program
{
	public static void Main(string[] args)
	{
		using (SentrySdk.Init("__DNS__"))
		{
		// App code
		CreateWebHostBuilder(args).Build().Run();
		}
	}

	public static IWebHostBuilder CreateWebHostBuilder(string[] args)
	{
		WebHost.CreateDefaultBuilder(args)
		.UseKestrel()
		.UseIISIntegration()
		.UseStartup();
	}
}
Cấu hình Serilog File Startup.cs
public Startup(IConfiguration configuration, IHostingEnvironment hostingEnvironment)
{
	Configuration = configuration;

	var builder = new ConfigurationBuilder()
		.SetBasePath(hostingEnvironment.ContentRootPath)
		.AddJsonFile("appsettings.json", optional: true, reloadOnChange: true)
		.AddJsonFile($"appsettings.{hostingEnvironment.EnvironmentName}.json", reloadOnChange: true, optional: true)
		.AddEnvironmentVariables();

	Configuration = builder.Build();

	Log.Logger = new LoggerConfiguration()
		.Enrich.FromLogContext()
		.Enrich.WithExceptionDetails()
		.WriteTo.Sentry(o => o.Dsn = new Dsn("__DNS__"))
	.CreateLogger();
}

public void Configure(IApplicationBuilder app, IHostingEnvironment env, ILoggerFactory loggerFactory)
{
	// TODO
	loggerFactory.AddSerilog();
}
Nếu bạn muốn log trong từng controller thì Serilog cũng hỗ trợ ngon luôn.
using Microsoft.Extensions.Logging;

private readonly ILogger _logger;
public IdentityController(ILogger logger)
{
	_logger = logger;
}


public async Task Login(string username, string password)
{
	_logger.LogInformation("Log here");
}
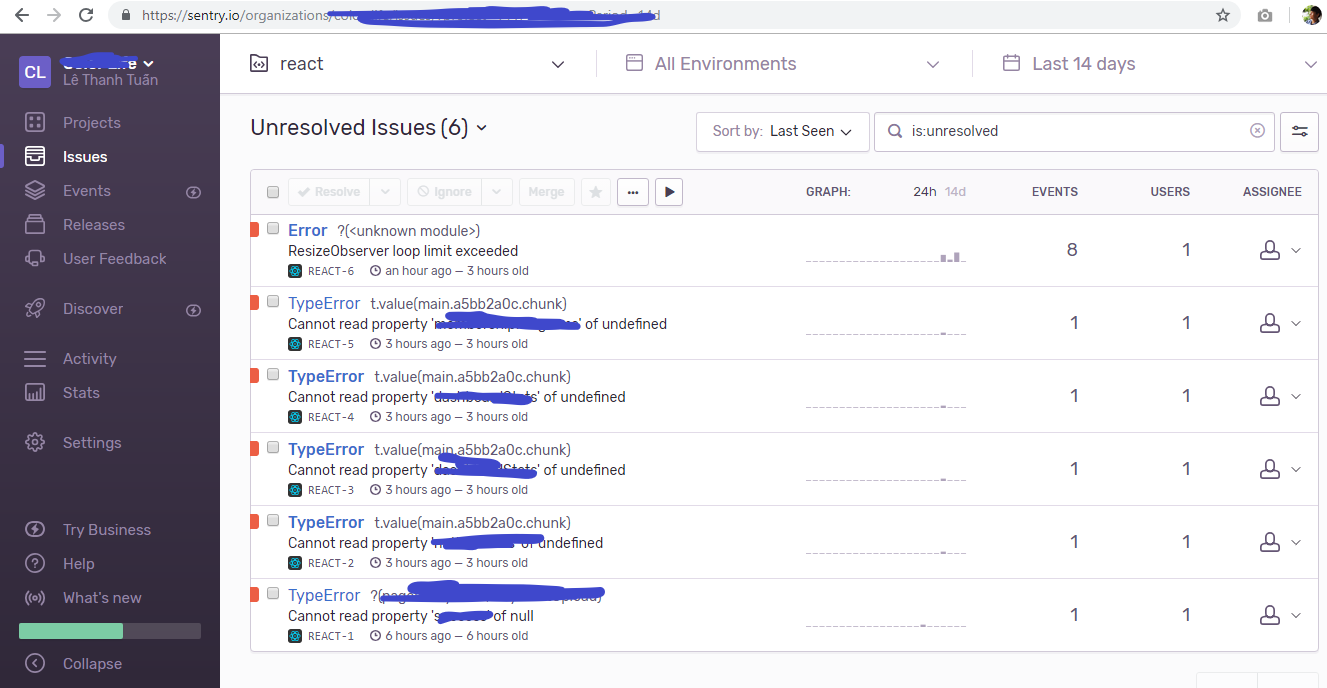
Như vậy xong phần cấu hình cho project .NET Core. Tiếp theo đăng ký sentry project reactjs.
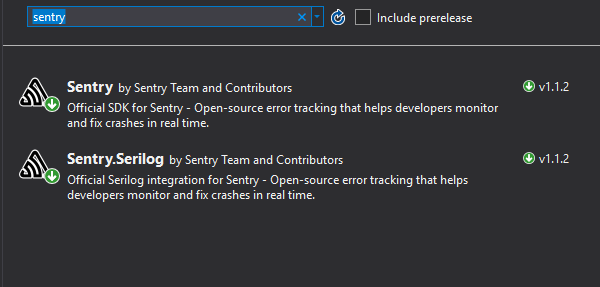
Cài đặt thư viện sentry cho reactjs
npm i @sentry/browser
Thêm đoạn code vào App.js hoặc chỗ nào bạn muốn log.
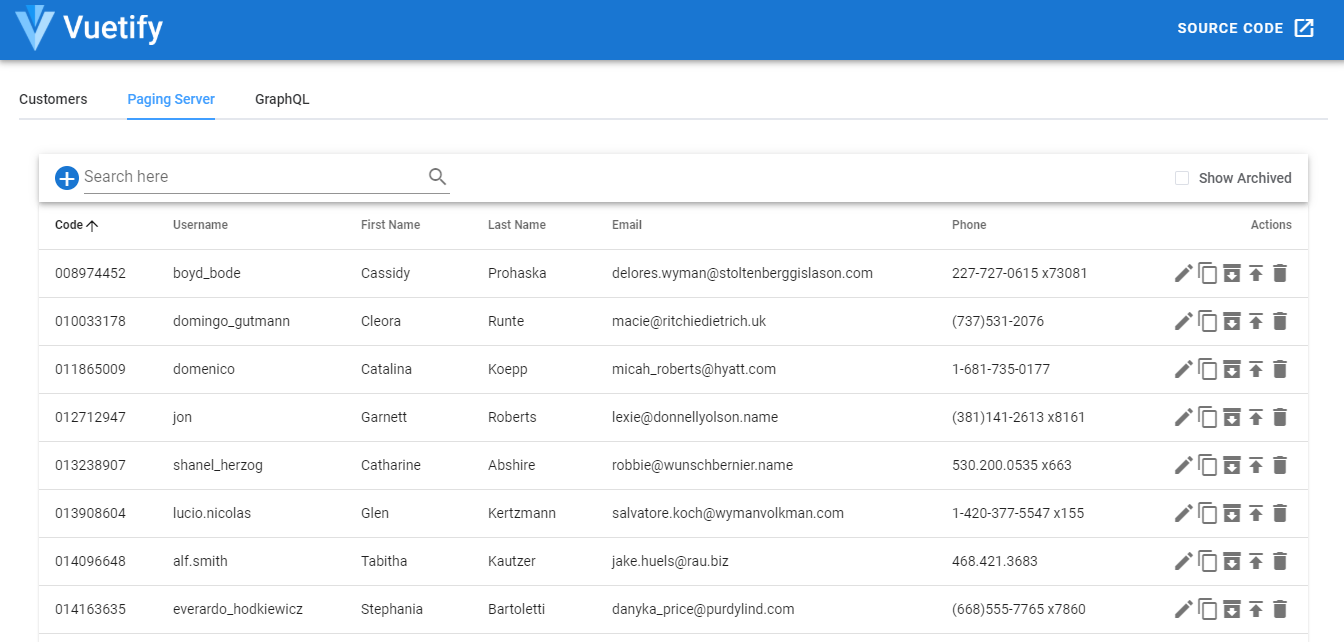
Khi làm các ứng dụng web, chúng ta luôn có nhu cầu lấy dữ liệu từ các remote server, API… các dữ liệu mạng xã hội, tin tức, shopping, thanh toán thì rất nhiều records, do đó chúng ta cần giải pháp phân trang để giảm tải sự hiển thị quá nhiều data gây khó chịu cho người dùng.
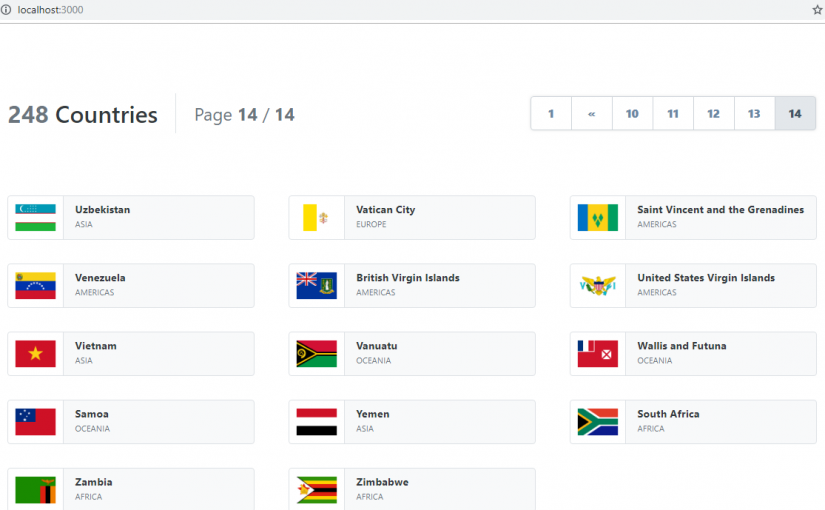
Hướng dẫn đơn giản sau đây giúp bạn dễ dàng phân trang trong app ReactJs
Ví dụ ở đây sử dụng API dữ liệu các quốc gia, 248 quốc gia tất cả. Chúng ta sẽ bắt đầu với ứng dụng react đơn giản.


 Tận hưởng thành quả
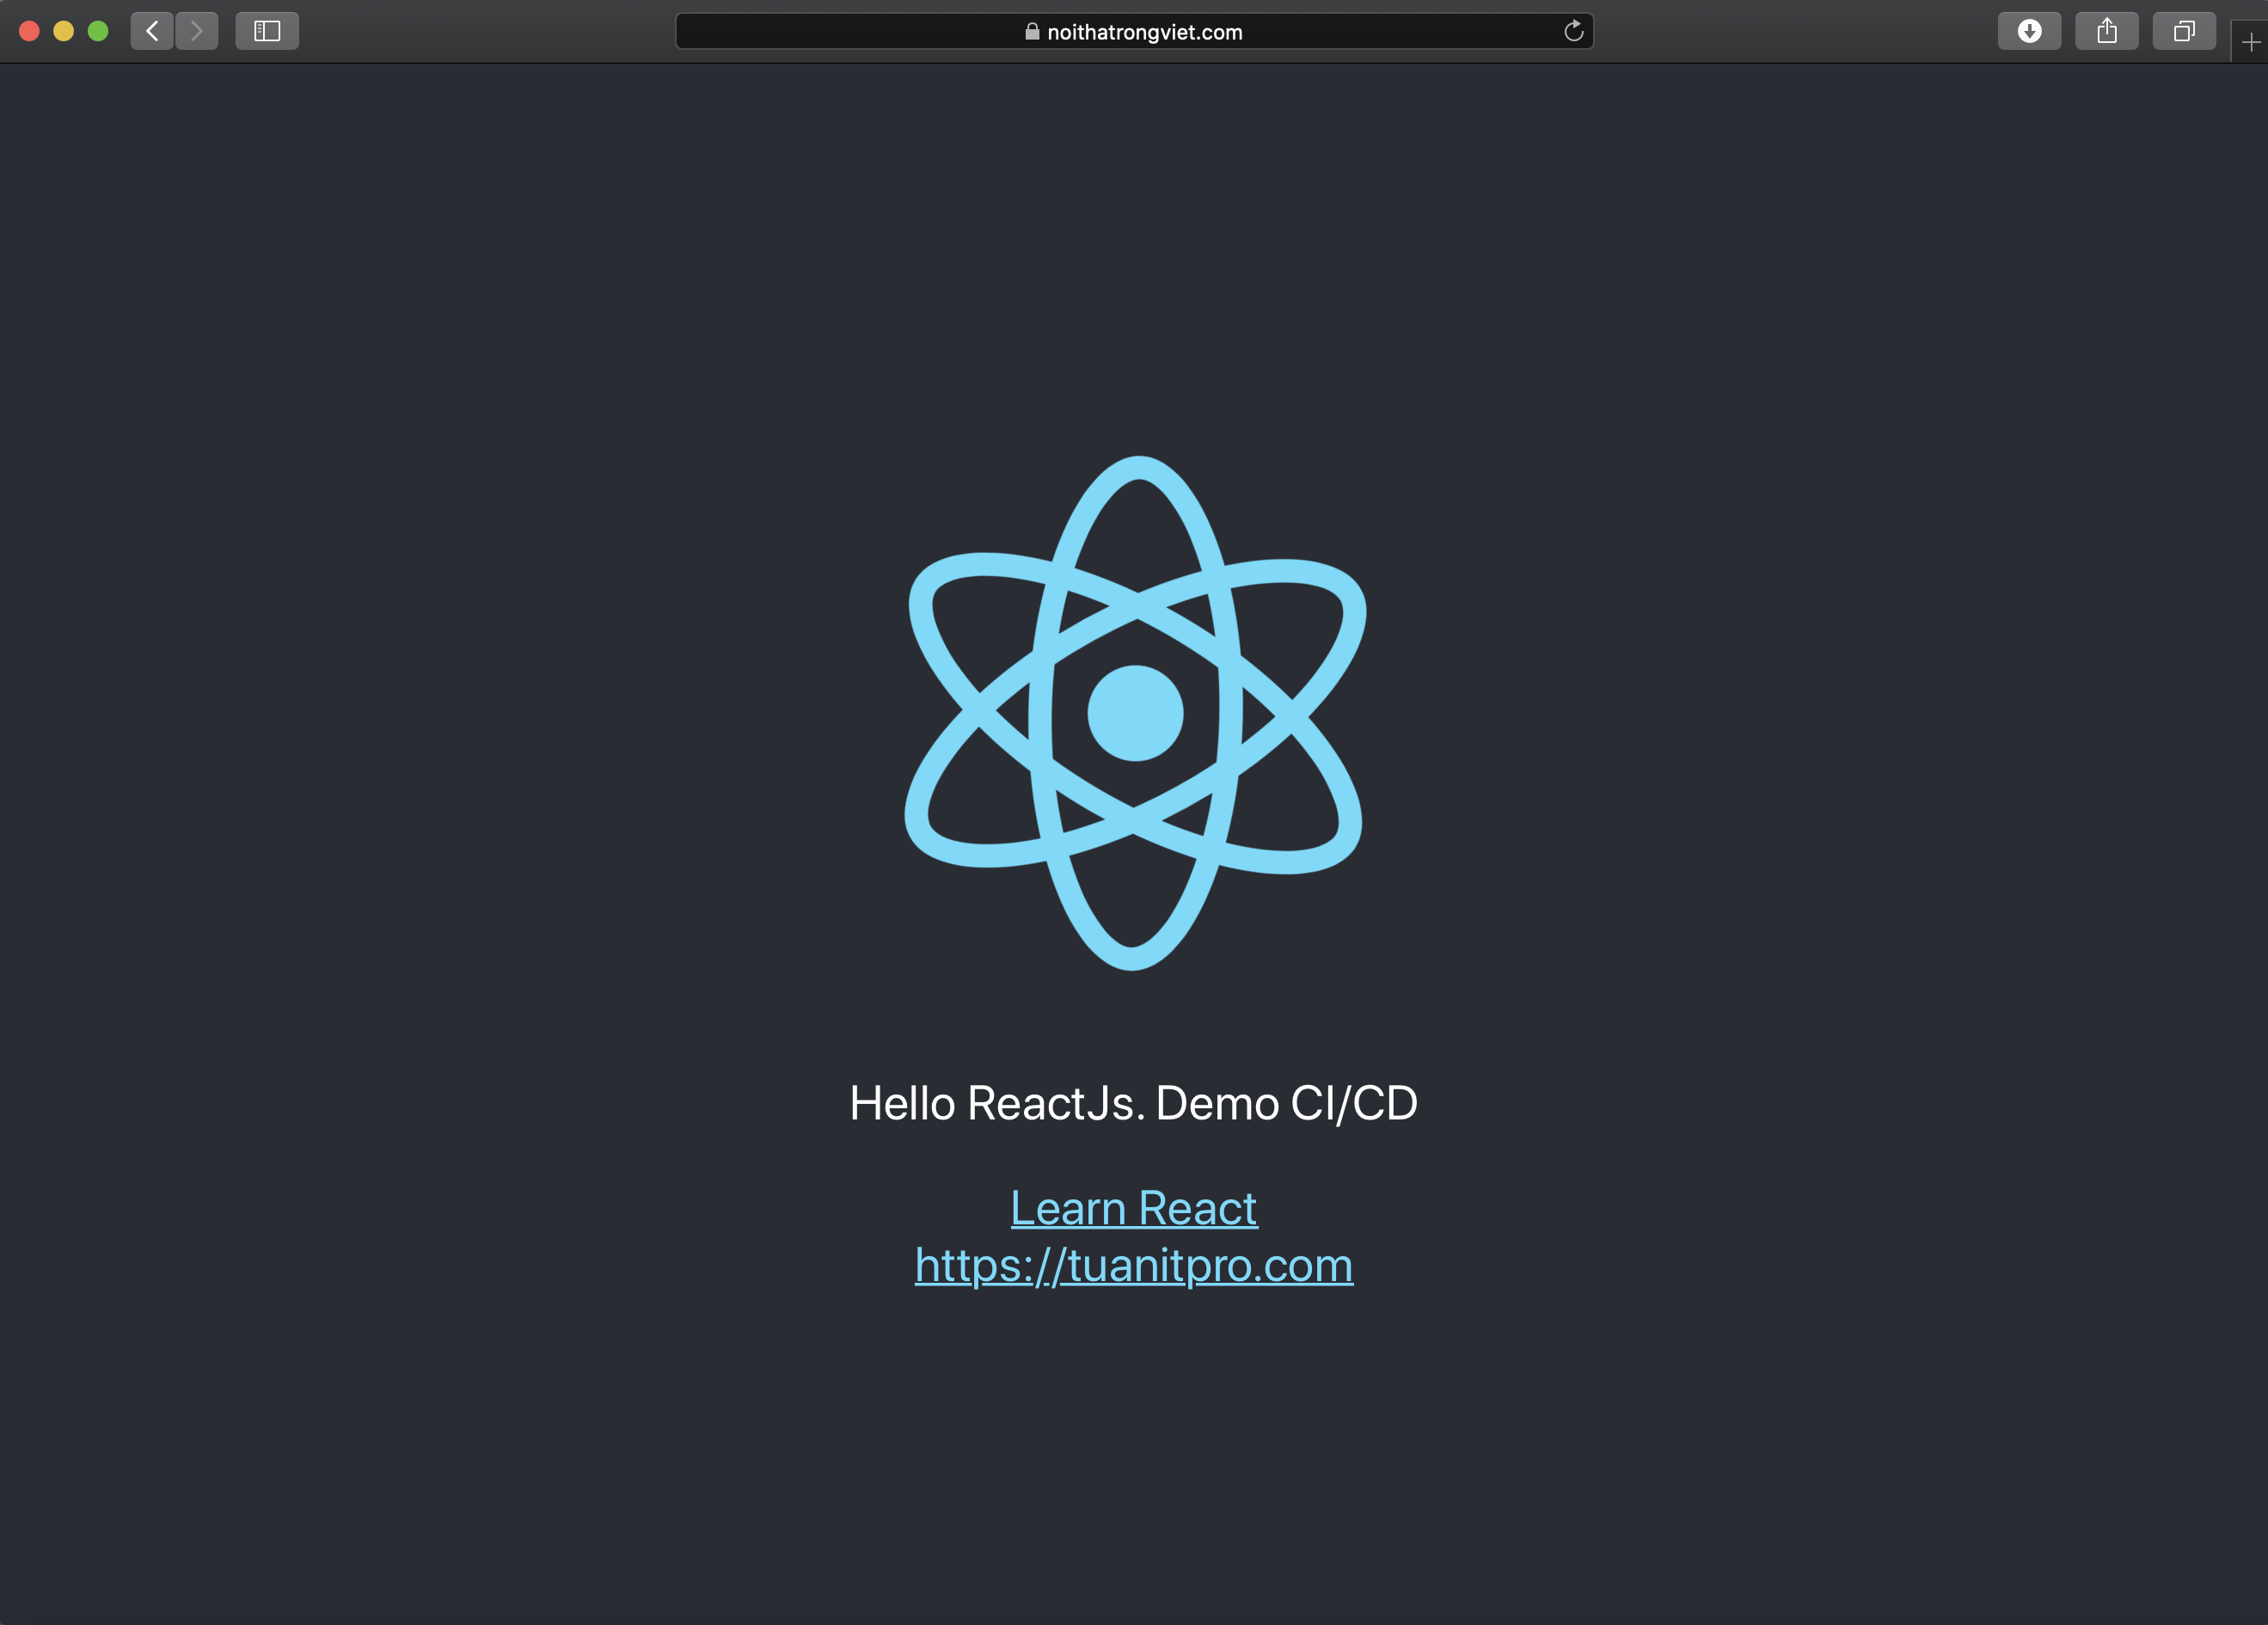 Chúc các bạn thành công. Từ nay cứ commit code là Gitlab tự động build và deploy lên host cho bạn, quá đã phải không.